Showing posts with label booze. Show all posts

Friday, July 5, 2019

Sweet Lil Orange Slice - #FakeFoodFriday from Ashley Lawler!

This nice little slice comes to you from Ashley Lawler, who I work with at the Opera! 
Materials: Plastic Orange, Model Magic, Foam Packing Sheets, Crystal Gel
Tools: Olfa Knife

Step 1: Cut a plastic orange into slices (use what you've got!)

Step 2: Take some Model Magic and sculpt some pith (ie the white part of the peel)

Step 3: For the inner, juicy part, it's two layers of foam packing sheets, with crystal gel and paint gluing them together.  A little detail carving and then finished with a bit more crystal gel and paint. 

Step 4: Glue into the rind, get a glass and twisty straw, and tah-dah!

Refreshing!


Friday, March 22, 2019

FFFriday: Martinis!

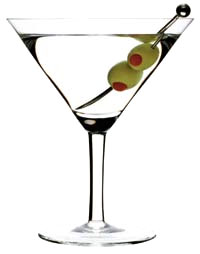
Happy Fake Food Friday everyone!  It's time for part 2 of our revisit of Anna's Dirty Martinis!  In part 1 I went over my olives, and now it's time for the fun part: The liquor!


Materials: Gel Wax, acrylic martini glasses, olives on skewers
Tools: Hot Plate, small pan, spoon

Anna used acrylic water for her martinis, but for ours I used one of my new favorite materials, gel wax!  I'll be doing a Materials Monday on it because it is so nifty and has so many uses.  In this project I used ArtMinds Gel Wax from Michaels.  
A quick run down of Gel Wax: it comes in a tub, and you can get it at pretty much any craft store in the candle making section.  You can color it with wax dyes and you can heat it on a stove top.  It's solid once it cools, so it's much quicker than the acrylic water.  
Hot plate set up


Because I didn't need to dye the martinis any color, I didn't bother to measure how much gel wax I was using.  I just put a bunch in a pot and let it heat up.  Because I wanted them to be as clear as possible, I made sure I heated the wax until all the bubbles were out and it was very liquidy.  The big risk in this is if you're pouring into an acrylic vessel (as is the case most of the time for theater) is that it might melt.  I didn't melt any glasses this time around, but I've definitely done so in the past (and will gladly share in my gel wax post).  I also read that you want to make sure to use a metal stirrer, not wood, because wood can introduce bubbles into the wax.  My skewers definitely did!


The cool thing about gel wax is you can pour it in layers and not get stratified lines because the wax just melts into itself.  These are my first two half pours.  I noticed that I was getting bubbles, both from the wooden skewers and from the cool air.  


They became more pronounced as the wax cooled.  


Heat the wax, heat the glass!

I tried to warm up my area and the glasses a bit with a space heater, and that did seem to help some.  


In the end, I couldn't get rid of my bubbles.  I did find that pouring the wax, then placing the olive skewer did help to make sure the wax got all the way around the olives, but bubbles still happened.  This wasn't a huge problem for us, as our house size is huge, and the bubbles actually made it look like there was liquid in the glass.  


Two of my best pours

I never did get a shot of all of them together, as we were rushing to get these to rehearsal.  I think they turned out pretty well, despite the bubbles.  If I were to do it again, I'd probably seal the skewers and olives in hopes that they wouldn't cause as many bubbles, but I'd want to do a test to see if a spray sealer would react in any way with the wax.  
Shortly after this project, (and after I had finished this tub of wax), I did a round of champagne with a different brand, Country Lane Gel Wax from Hobby Lobby, which barely bubbled at all!  That was unfortunate for the champagne, but would have been perfect for these martinis!  Ah, well, live and learn.  

I'm not really a martini girl, so I can't say this project made me want one, but my summer boss Randy is a big fan, so I'm going to end this with a quote from him.  

"It's like a salad if you get it extra dirty" 

Cheers!

Friday, March 15, 2019

Fake Food Friday - Pimento Stuffed Olives!

It's that time of the week, y'all!  For this week's Fake Food Friday,  we're going to start a 2 part post looking back on Anna's Dirty Martinis.  I used her process to start off, and made a few adjustments.  She, too, improved up on her olives in this post, and my process was pretty similar.  

Materials: Sculpey III, mini skewers
Tools: drinking straw, parchment paper, toaster oven

We had to make 14+ martinis, and according to tradition an even number of olives in a martini is 'incorrect.'  


Due to the large house size, we opted for 3 olives per skewer.

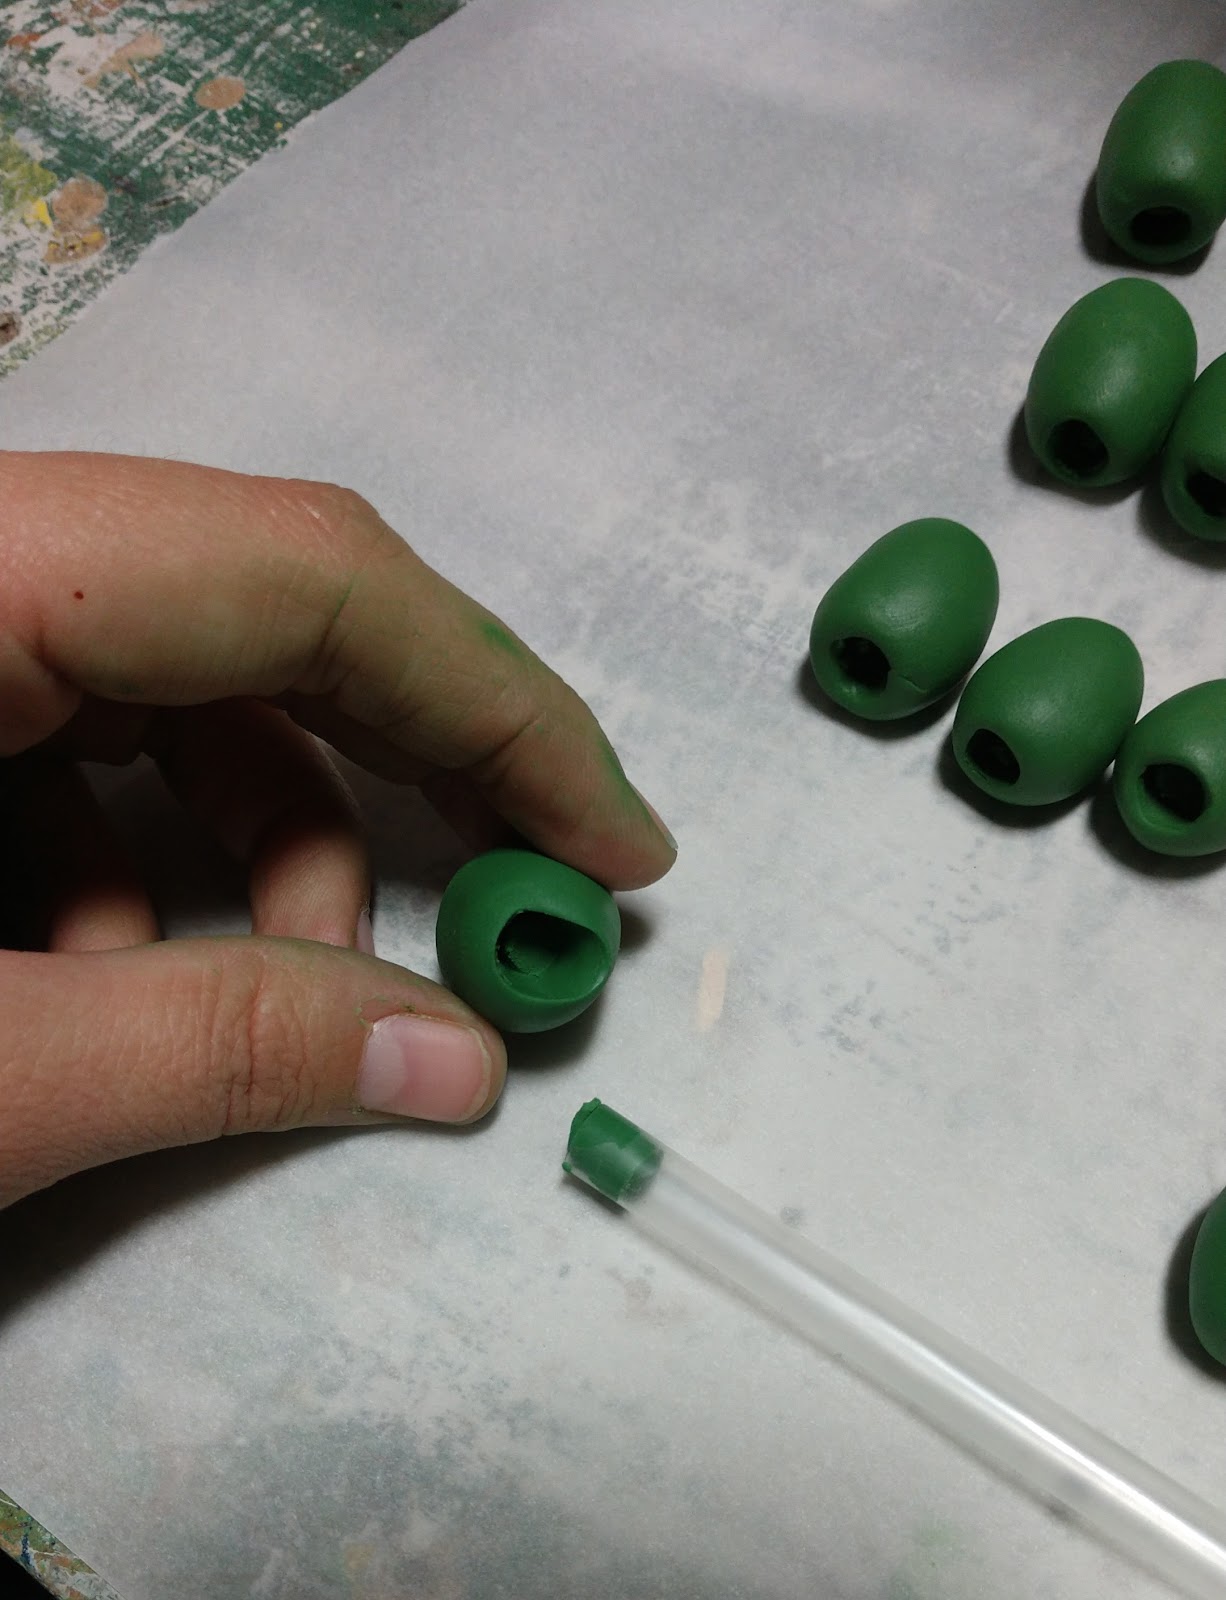
To make the pit hole, I used a straw and then gently reshaped the end.  I found it was easier to do this after the olives had set a bit after I shaped them initially.  If the Sculpey was too soft, the olive lost shape completely.  

The pimento is just a bit of red Sculpey.  Apparently olives with pimento are also incorrect in a martini according to this blog.  But green blobs wouldn't read in row FF, you know?


For the skewers, I needed something longer than traditional toothpicks, but we didn't have any cocktail spears that weren't plastic, and we learned from Anna's olives that plastic will melt in the oven.  Thankfully we had some large cocktail umbrellas that we knew we wouldn't need in the next season and a half, so I harvested their sticks.  Sorry umbrellas.  I also soaked those mini skewers in water, much like one would do before grilling kebabs.  No one wants charred martini skewers!


I made sure to line my tray with parchment paper so nothing would stick.  
Sculpey III bake time is 15 min per 1/4in at 275°F .  I opted for about 40 minutes as my olives were about 1" x 1/2".  
I should note that toaster ovens are not the most precise machines.  Most Sculpey sites suggest using a oven thermometer to make sure your temperature is correct.  

I did not do that.  


Bake little olive babies!

As you can see, my toaster oven was a bit too hot, or I left them in a bit too long.  From a distance you couldn't see the scorch marks, so I was more careful with round 2.  


Next week I'll cover the gin portion of our martinis!

Happy FFFriday! 

Tuesday, October 19, 2010

Dirty Martinis

Hey all! Sorry for the delay in a new post. I worked on a commercial shoot these last two weeks that completely took up my time. Please enjoy this week's post!

Materials: Acrylic Water (the kind florists use), Martini Glasses, Toothpicks, Sculpey, Acrylic Paint, Spray Paint


So, this is a project with a couple of issues- one was an I-D-10-T error (I was being an idiot) and one was more about being unfamiliar with the materials.  I'll explain both when we get there.  These martinis were made for  Milwaukee Repertory Theater's production of  'Cabaret.' We needed spill proof champagne and martini props for the Kit Kat Klub patrons to wave about while they caroused.  I did a few samples before I settled on the Acrylic Water. Neither Smooth Cast 325 nor the year old Zeller Opti-Kleer that I had in stock was water white or bubble free, so I ran over to my favorite floral wholesaler, and picked up a bottle of Acrylic Water.  This is a two-part acrylic resin that is used in the vases of silk floral arrangements to simulate water.  It is easy to work with, water white, virtually bubble free, and has a beautiful refractive quality in a glass. I've never used it before, but I was eager to give it a shot, and I'm glad that I did. (There was no MSDS, and I didn't have time to request one, so I took the same precautions as I would with any two part resin. I used the appropriate PPEs, and worked in a ventilated area.) 

Jim Guy, my boss, and Props Director Extraordinaire, found these acrylic martini glasses at World Market.  Aside from having a nice look, the thick stems are sturdier than a typical martini glass, which helps to keep them from breaking or tipping when the acrylic makes them top-heavy.  Aside from the glass, the most important identifying characteristic of a martini is the olive.  These olives are made from white Sculpey brand polymer clay. 
Aren't they hilarious? White model olives!
White was the only color of Sculpey that I had on hand, so I had to paint them.....but I'll get to that later.  I shaped the olives by hand, and used a pen cap to give them the round impression that looks like a pimento. I decided to put two olives in each glass, to add color and help take up volume. Then, I made a stupid mistake. 

I decided to put the two olives on skewers before baking them. This was not the stupid mistake.  I went down to our stock hoping to find metal toothpicks. Faced with the decision between wooden toothpicks and plastic toothpicks, I chose plastic. The voice in my head said "Don't do it, they'll melt in the oven," but the tired part of my brain that had been working too hard said "Nah, it'll be fine." STUPID!  Here's something I've learned in theater and life. If that little voice in the back of your brain pipes up, it's usually right, don't ignore it.  So I baked the Sculpey olives on their plastic toothpicks, and I melted the plastic toothpicks. I didn't melt them entirely, just enough to make them misshapen and saggy.  Stupid.  Since I was working with limited time, I did my best to straighten them out, painted them silver, and carried on, hoping that the refraction of the acrylic in the round glass and the distance to stage would help me out.  Luckily, for the most part, they did. 

Olives before baking.

I also painted the olives. For the green of the olives, I used Design Master spray paint, for the pimentos, I used red acrylic paint.  I probably should have given the spray paint a bit more time to cure, but as I said before, we were pressed for time.  I dropped a skewer of olives in each glass, mixed the acrylic according to the directions, poured the martinis, and left them to cure for 24 hours. 


Once cured, the acrylic is beautiful and durable,  The overall effect from stage is actually very good. There was no reason not to send these martinis on stage. There was, however, a swirl of paint coming off of the olives into the martini.  It looks pretty cool actually, but it isn't part of what I intended the martini to be.

See? GRRR!

I think that if I were to duplicate this project, I would use green and red Sculpey instead of attempting to paint white Sculpey. As it was, we said that I meant to do it, called it a dirty martini, and sent it onstage. I highly doubt that the audience, or even the performers, noticed that anything was amiss.  It wasn't  the perfect prop that I would have liked it to be, but I learned a few things, and got to try a new product, so I can't complain too much.  But hey, if I did it perfectly the first time, what would be the fun of doing it again? Cheers!

Sunday, March 21, 2010

Mocktails!

Booze!- It's booze week here on the Fake-n-Bake blog! This week, I'll be pouring you a measure of what I know about getting people "drunk" onstage. Enjoy, and, as always, please throw in your two cents!


For obvious reasons it is rarely, if ever, a good idea to give performers alcoholic beverages to drink onstage. That said, it is incredibly common for shows to involve alcoholic beverages. Luckily for us, many different things can be substituted for alcoholic drinks.

Water- For any clear liquor (Vodka, Gin, Light Rum, etc.) water is the perfect substitute. Tasteless, odor free, non-staining, and it doesn't do anything to inhibit the voice of a performer. If you can't get a performer to drink water onstage, chances are, they won't be drinking anything.

The Diet Cola Cocktail- My boss, and famed Properties Director, Jim Guy swears by this concoction. Simply dilute flat diet cola with water, a good start is 1 part cola to 4 parts water. It gives a nice caramel liquor color, which works well for whiskey, bourbon, scotch, etc. There are no calories, and you can make it using caffeine-free diet cola if your performers prefer.

Colored Water- This one is pretty self explanatory, food coloring can be used to color water. Caramel-colored food coloring can be purchased at most places that sell cake decorating supplies. Keep in mind that most food colorings, especially red ones, can stain fabrics.

Tea- Lipton tea is very commonly used as liquor onstage, as it can be diluted easily with water. Beware though, the slight foamy ring that can give it away. Herbal teas can also work very well. Orange herbal teas have a nice red color that lends itself well to playing cognac or sherry. Hibiscus tea has an incredible red color, and is non-staining (test your fabric to be sure), but has a very tart flavor.
Juice- Grape juice, red or white, is a common substitute for wine onstage. Be careful, though, as some performers do not like the way that sugar affects their salivary glands, and thus, their voices. Also, beware that juices can stain. Sparkling juices can be a good substitute for champagne.

Ginger Ale (Regular or Diet)- This is a good substitute for beer or champagne, if your performers don't mind the taste/sugar content. If you can't get the "beer" to hold a head, a spoonful of foaming bar sugar preset in the glass before pouring should do the trick.
Non Alcoholic Beer- Yup, pretty much exactly what it says it is.

Some Things to Consider:
As props providers, it is part of our job to facilitate the performers. It can be very frustrating to find the right thing to give a picky actor, but imagine being onstage, trying to sing and dance in a heavy costume, under hot lights, with hundreds of people watching, and have your voice catch in your throat because you just had to guzzle down some syrupy fake champagne. Or imagine being asked to down 4 ginger ale "beers" a night- and still fit into that size 4 dress. Performers have real concerns about what goes into their bodies on and offstage, and we should do our best to accommodate those concerns. Of course, we are faced with budgetary and time limits, but some work up front can save money and frustration during tech. Have a conversation with your performers early on in the rehearsal process, giving them some options. Let them know that they can choose between colored water, tea, or diet soda, or whatever the prop calls for. Your stage manager should be able to facilitate this conversation- and it will make the performers more comfortable as well. There will always be some difficult performers, but heading them off at the pass should make everyone's job easier.

Some things that can make performers uncomfortable:
Calorie Content- Whatever they are consuming onstage, they may have to do it up to eight times per week.
Sugar- Sugary drinks can be hard on the voice, but some performers prefer to have a little blood sugar boost mid show.
Dairy- Dairy products turn mouths and throats into gooey messes, making it very hard to sing or speak well.
Caffeine-Some performers would like to get a good nights sleep after the show.
Artificial Sweeteners- Some performers prefer natural foods.
Quantity- In 'State of the Union' one actress had to down six cocktails in fifteen minutes- and then sit onstage for another half an hour with no bathroom break. In that case, we used a false bottom and a handful of fake ice to make her job easier. Finding glasses with thick bottoms and employing fake ice is way easier than asking the costume department for a catheter. ;)

The bottom line is, communicate with your performers. Everyone has different needs and preferences. Allergies, medical needs, and tastes should all be considered when deciding the right solution for your props.

Happy pouring!

Categories

props (35) fakery (31) faux (25) food (25) fakefoodfriday (24) theater (24) Fake Food Friday (22) cake (10) foam (9) kitchen (9) caulk (7) Albert Herring (6) casting (6) insulation foam (6) opera (6) Design Master (5) Smooth-On (5) booze (5) desserts (5) drink (5) edible (5) jaxsan (5) microfoam (5) molding (5) acrylic (4) carve (4) ham (4) resin (4) acrylic caulk (3) beverage (3) candy (3) cheese (3) cocktail (3) dressing (3) fruit (3) latex (3) model magic (3) period (3) upholstery foam (3) urethane (3) vintage (3) Helena Mestenhauser (2) Ilana Kirschbaum (2) Sarah Heck (2) acrylic paint (2) appetizers (2) brownie (2) casserole (2) chocolate (2) confection (2) decorating (2) dial (2) ephemera (2) fish (2) flower (2) foam sheet (2) gel wax (2) hot pour vinyl (2) leg (2) link (2) mocktail (2) mother mold (2) pies (2) pizza (2) reference (2) research (2) safe (2) salt dough (2) sandwiches (2) tutorial (2) wrappers (2) Canapes (1) David Russell (1) Dowel (1) Dragonskin (1) Ellie Bye (1) FX (1) Flex Foam-It (1) Fritos (1) Introduction (1) JT Ringer (1) Jess Smith (1) Keli Sequoia (1) Materials Monday (1) Oona Tibbetts (1) Poultry (1) Sara Pool (1) Serena Yau (1) Skylight (1) Smoothcast 325 (1) Turkey (1) Victoria Ross (1) Wonderflex (1) Worbla (1) alcohol (1) alginate (1) apoxie (1) aspic (1) banana (1) bead foam (1) bread (1) bundt (1) cabbage (1) carnation (1) cellophane (1) champagne (1) cheesecake (1) cherries (1) chilaquiles (1) citrus (1) clear (1) coat (1) coke (1) cola (1) contact adhesive (1) cork (1) cotton batting (1) cream (1) drinks (1) dumplings (1) fake steam (1) faux mex (1) flexcoat (1) fondant (1) fruit salad (1) glass (1) great stuff (1) gum paste (1) hands (1) herring (1) hors D'ouevres (1) icing (1) intern (1) joke (1) katie webster (1) kolache (1) labels (1) lettuce (1) life casting (1) liquid (1) martinis (1) marzipan (1) meat pie (1) menu (1) mini fogger (1) mini mister (1) nougat (1) olive (1) olives (1) oranges (1) pan dulce (1) paraffin (1) pastries (1) pastry (1) peas (1) petit fours (1) pickled herring (1) pie (1) pie crust (1) pineapple (1) prosciutto (1) punch (1) restaurant (1) samosas (1) sculpey (1) shrimp (1) small pastries (1) snacks (1) soda (1) sorbet (1) spilled (1) stage effects (1) sugarplums (1) sweetmeats (1) sweets (1) taco (1) tomato (1) tuna (1) tv dinner (1) vacuform plastic (1) violets (1) wax (1) welcome (1)