Showing posts with label model magic. Show all posts

Friday, June 21, 2019

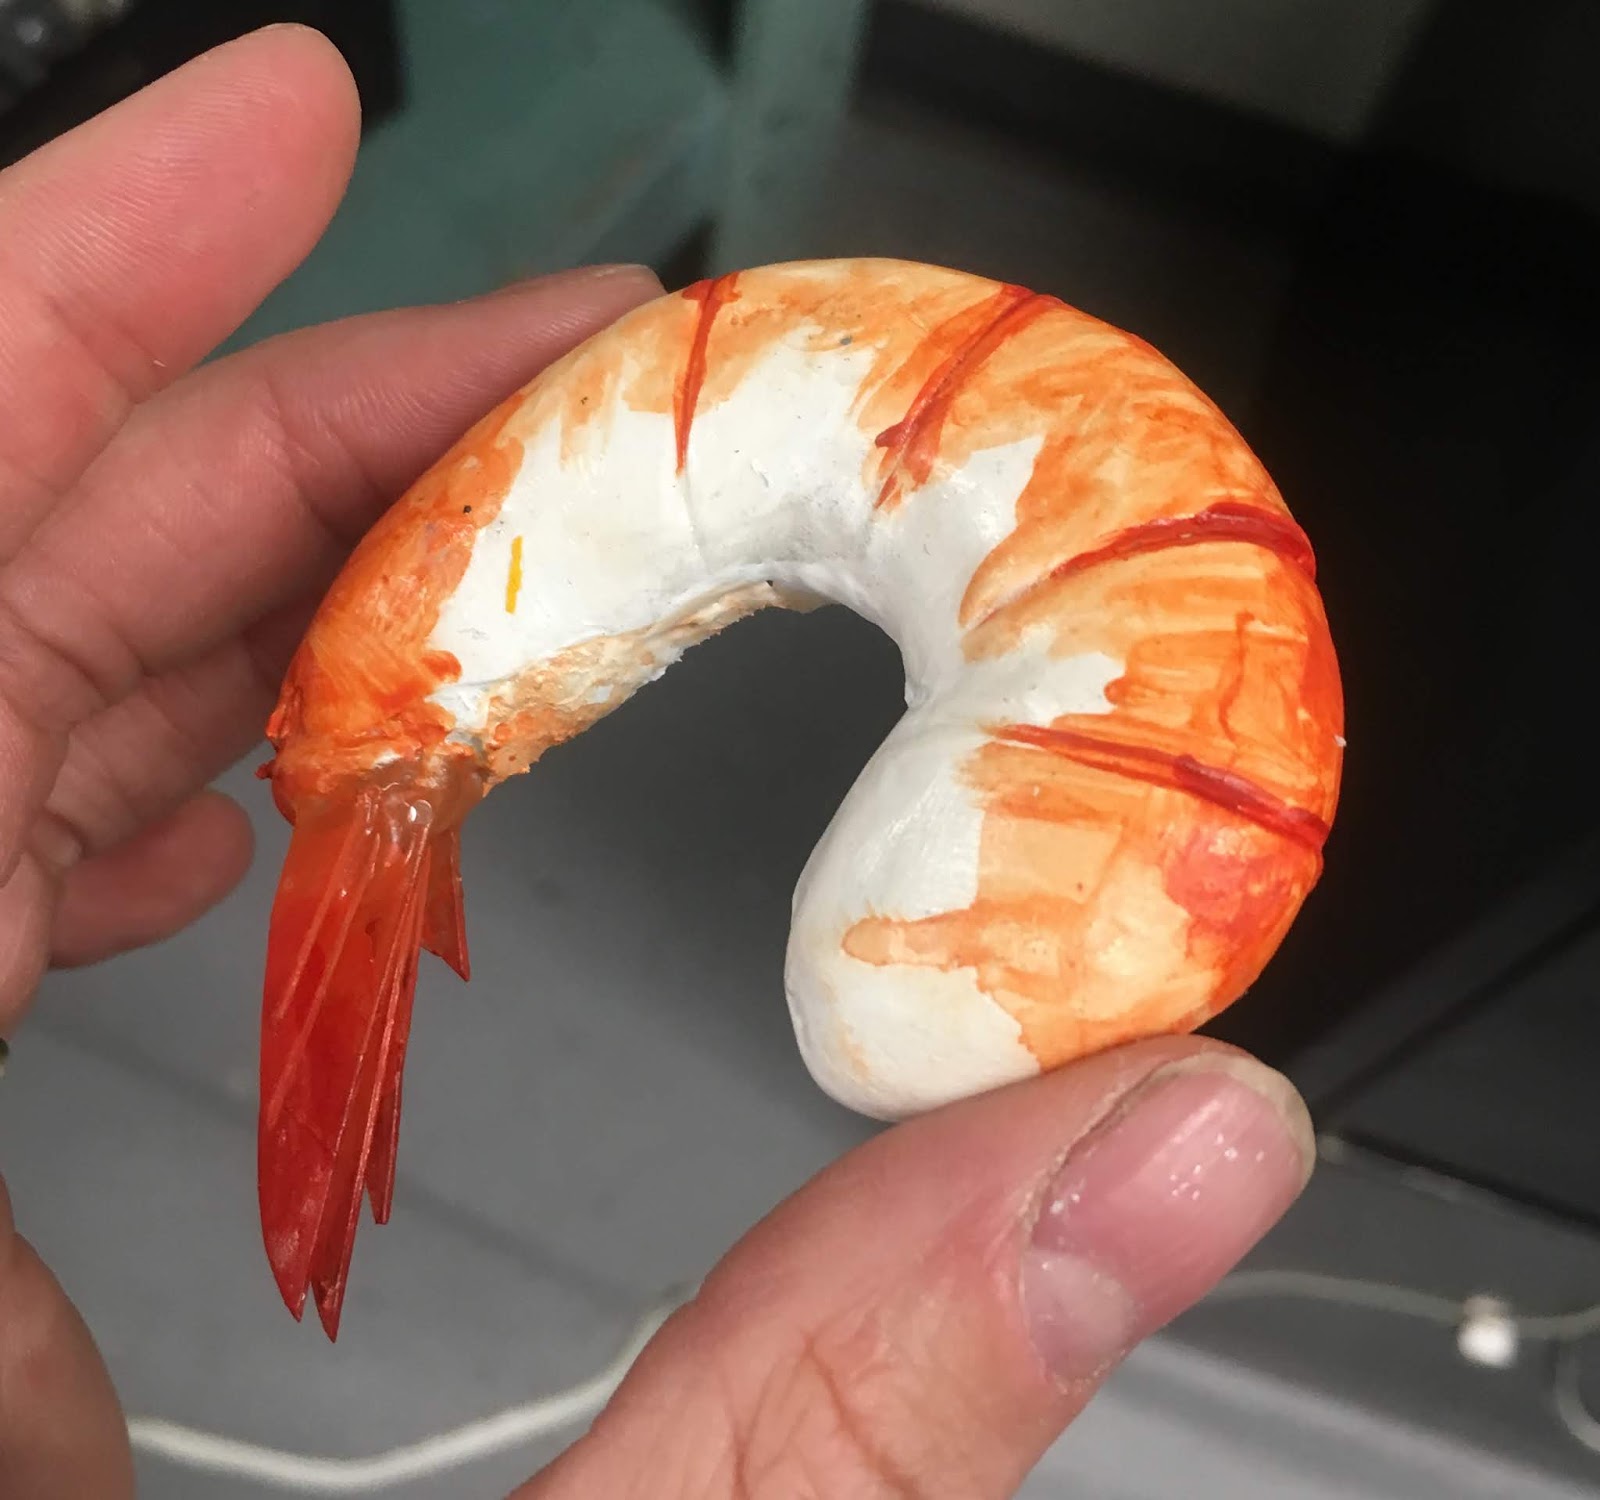
Cocktail Shrimp! - #fakefoodfriday from Sara Pool!

This week's post is a little different, as I asked the lovely Sara Pool to send me the pictures for these delightful shrimp, but I'm going to write the process up, because I witnessed the magic FIRST HAND, as she and I work at ye olde Opera together.  We are also currently co-craft heads on La Boheme, and that's what these shramps are from!  (Yes, I did say shramps.  You can thank our lovely founder Anna for planting that one in my head years ago, and there it remains.  SHRAMPS!) Onto the crafting!

Materials: Insulation foam, Crayola Model Magic, scrap vacuform plastic, acrylic paint, hot glue
Tools: Olfa knife, sandpaper, scissors, cheese knife, clay tools

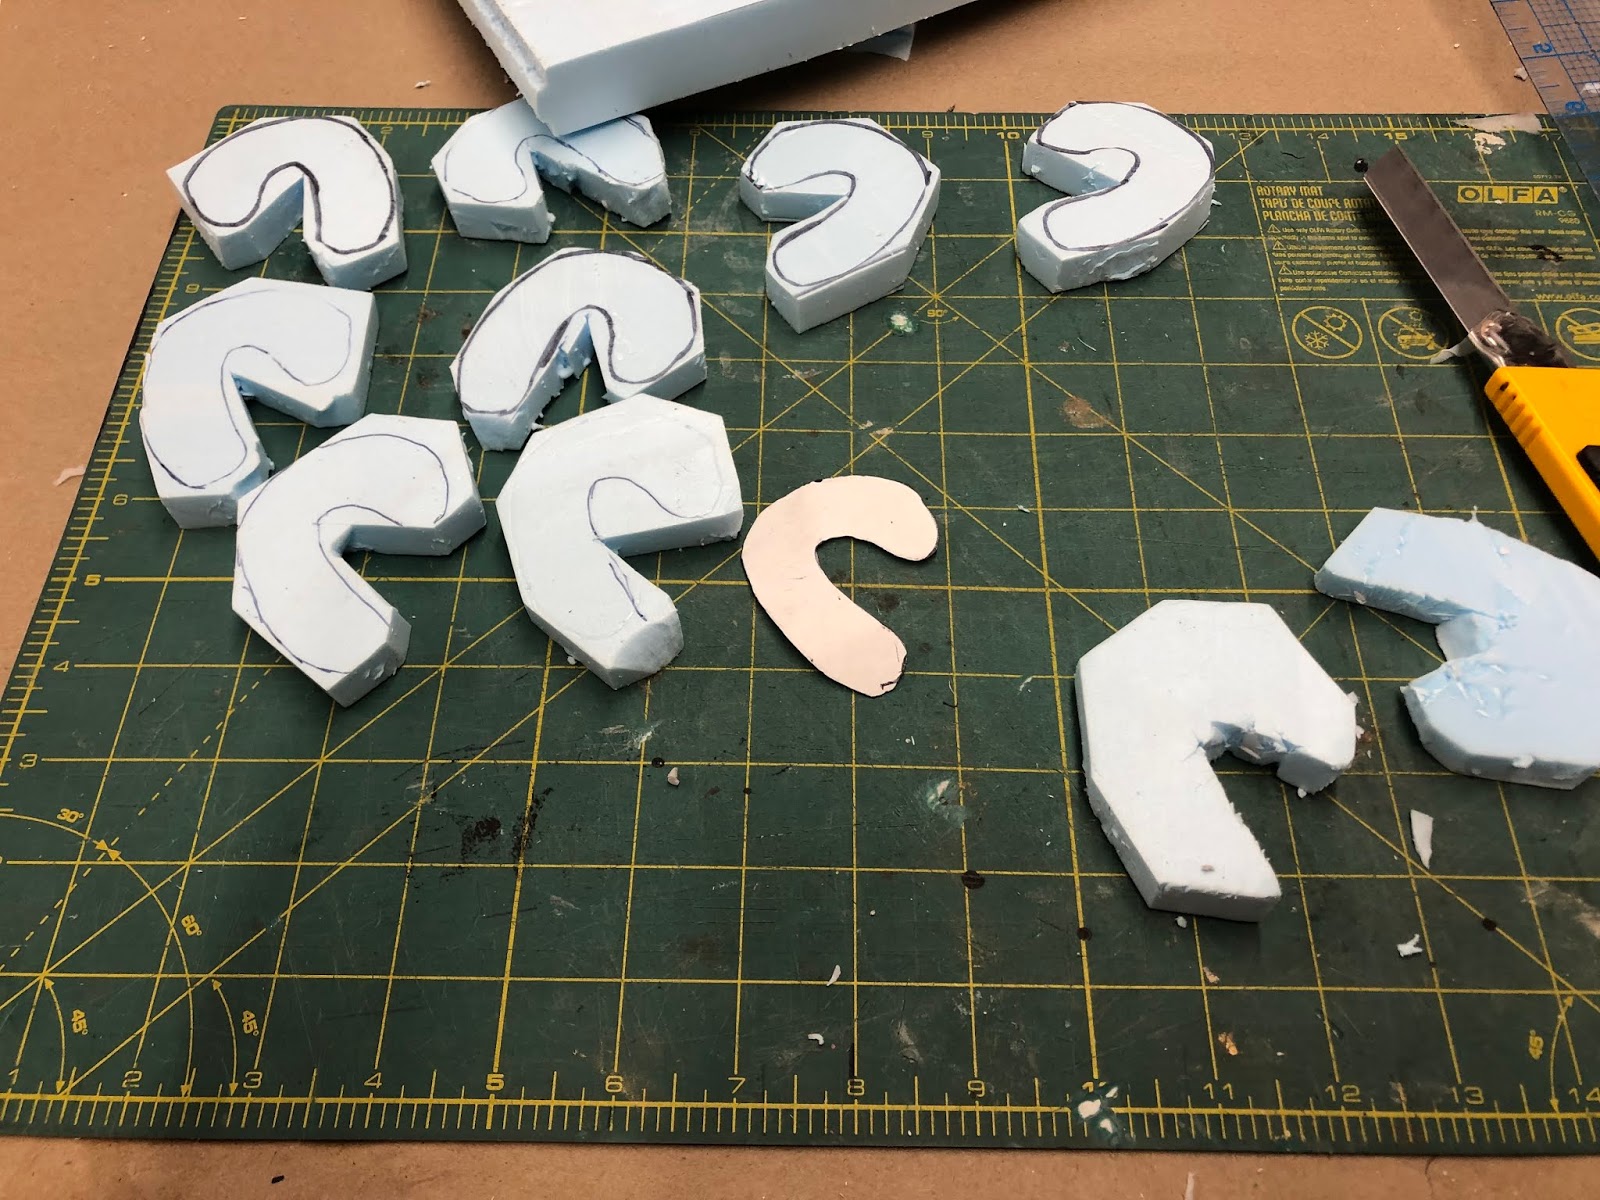
These shrimps started out as many food projects do, with the general shape cut from insulation foam.  

However, we only had 1 inch foam, which was a bit too hefty for our shrimps, so Sara cut them all in half.


Then there was some sanding 

So shrimpy

For the tail, Sara cut some scrap vacuform plastic into tail shards (shards seems like such a harsh word, but I can't think of anything better?)


Those pieces were then glued into the tail of the shrimp body with our good friend hot glue


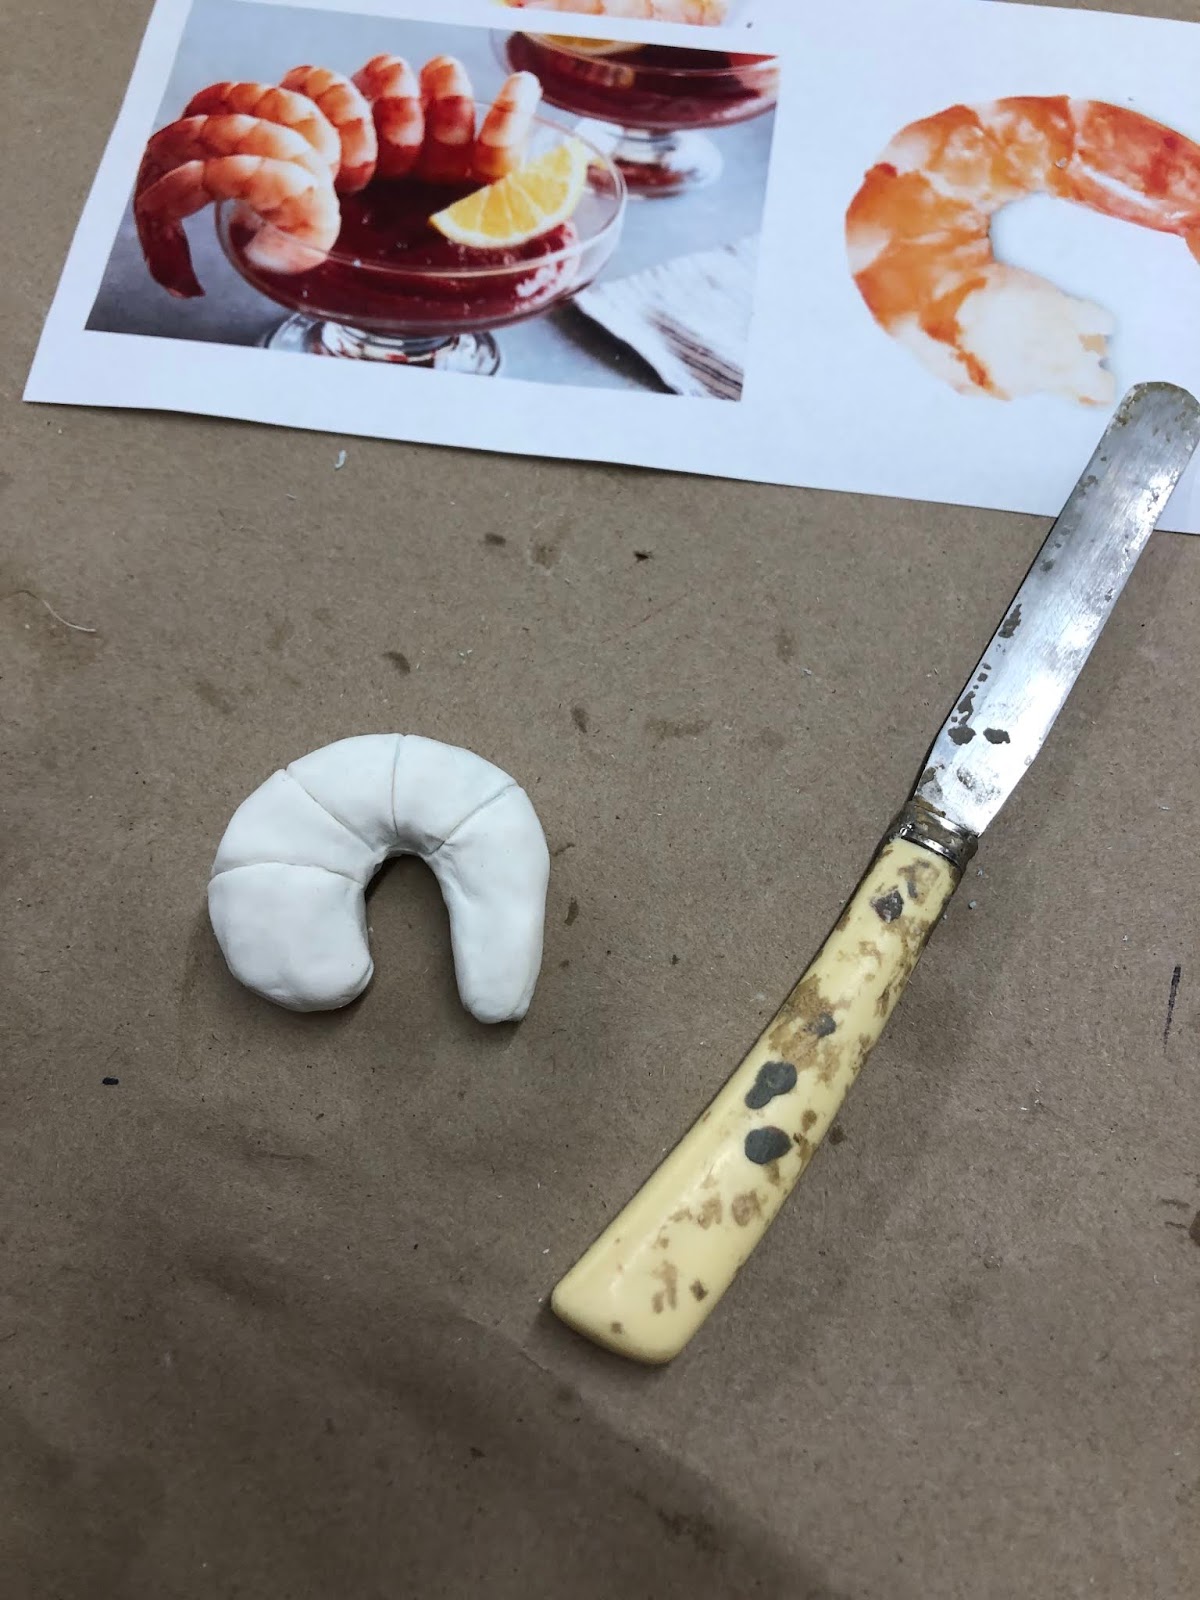
To give the body some more dimension, the foam bodies got some Model Magic detailing


(I had suggested trying some fun foam for the shell, but that was a BAD IDEA and the poor shrimp looked like a tiny croissant)


Some artful indents gave the illusion of the shell segments really well!  To achieve this, Sara used a combination of some clay tools, and also a dull cheese knife (honestly, I can only assume this was a cheese knife... it's been in our carving tools since before I started)

This was a segment trial, before the tail was added!

At this point, during a break, Sara made the astute observation that her toes and the shrimp were quite similar

#summerstockobservations

Then the shrimps were sent off to one of our very talented painters, Serena Yau, who brought them TO LIFE.  Well, to beheaded, steamed, and put on ice life...

Trash Rat Approved!

Eventually these shrimp ended up on a tiered seafood tray (as previewed in the shrimp to pic) surrounded by fake ice.  So good!!  Boheme opens in one week from today and I can't wait to see these on stage!  
You can see more of Sara's work here and Serena's work here.  Happy Fake Food Friday, and Prop On!

Friday, June 7, 2019

Cherry and Pistachio Nougat - #FFFriday!

For one of our operas this season (La Boheme!) we have a scene set in 1830-40s with a lot of vendors.  One very delightful item we needed to make was some nougat!  Our Instagram followers have had a preview of this one, as I've been sharing some process shots over there.  


Materials: Crayola Model Magic, Acrylic paint, iridescent gift wrap, transparent tape, Joe's Sticky Stuff, Stock silver platter
Tools: Knife, ruler, Olfa blade, scissors

I haven't written a Materials Monday post about Crayola Model Magic yet, but I did write some about it in the Marzipan Hedgehogs post, and it really is one of my favorite fake food materials. And it is the perfect texture for nougat! Originally I was going to add some plastic orchid buds (you can see them in the background of the photo below) to be my pistachios, the color and shape were perfect.  However it was pointed out that if all of the mix-ins were the same density (or material) that cutting would be immensely easier.  
A warning on this one: this project took a LOT of patience due to dry times.  Even working  in a literal desert, it still took daaaays.  Nearly 2 weeks passed between first sculpting and final wrapping.  Model Magic is air dry only, and I've not attempted drying it in any other manner. I did contemplate trying a toaster oven (non-food use only, of course), but I didn't want anything to burn...


Day 1: I started with white Model Magic and some acrylic paint for almonds.  I rolled them into balls and generic almond shapes.


I then repeated the process for pistachios.  I wasn't terribly concerned about how they were going to look, as they were going to get mixed into the nougat, then cut. 


I then let them dry out in the sun for a few hours.  They got a nice 'skin' on them, and to help them along (and make them easier to mix), I cut them in half.

Dry little nut babies! Dryyyyyy!

Next, I made some dried cherries.  To get enough color, again starting with white Model Magic, I had to add A LOT of paint.  From experience, I knew this was going to make it quite sticky, but I only had the white MM to use.  If I did it again, I would have started with a base red so I wouldn't have to add so much paint.  Once I had the color I wanted, I rolled the MM into snakes and picked off odd sizes to look like cut cherries.  Like the nuts, I wasn't super concerned about how they looked pre-mix.


After making the little cherry chunks, I set the cherries and nuts out to dry in the sun yet again.  I left them out for the rest of the day and worked on other projects.  

Please enjoy our desert setting, sand and rocks and a retaining wall.

Day 2: I set out to make the nougat out of even more Model Magic!


I got a bit too excited about my off-white nougat base, and added too much paint.  I added more MM, which worked out well in the end, even though the color was definitely darker than I had hoped, and very close to the almond color. 


I will fully admit that I've been watching a lot of the Great British Baking Show, and I was certainly treating this like a bread dough.  There was a lot of kneading involved (hence the slap-dash waxed paper taped to my table).  I flattened it out to add my nuts and cherries in!


And then so much mixing commenced!


I ended up cutting some of the pistachios into quarters for better mixing.  Model Magic is easy to work with, but mixing a beast this big was very tiring...  


I mixed nearly all of my nuts and cherries into the mass, but it was pretty arbitrary.  I then smushed it all into a baking pan I found in stock!

So nougatyyy

In hindsight, I probably should have put some sort of release agent on the pan, but it was non-stick and I thought it would be fine.  And now, the waiting began...  I knew it was going to take a while for the mass to dry, so I set it outside to take advantage of the dry air and sun. However, I was leaving a real baking pan with an irresistibly pokeable material in it, out in a path where people would be walking past.  And after 9 years of working here, I know how my curious co-workers would react.  After an entire day of sitting outside, the nougat was still pretty soft.  I was hoping that by the next day, it would be pretty dry!  


Day 3: My hopes were dashed.  I let it sit in its pan for another day, to let it firm up.  

Day 4:  By the end of the day, the nougat was somewhat dry, and I felt confident enough to peel it out of the pan.  And let me tell you, it was still quite wet and squishy on the underside.  Fortunately it was Saturday, so I was able to let it sit out for an entire day without me or anyone else wanting to poke or cut it open.


Day 5:  A day of rest for me and the nougat.  

Day 6:  Still not dry.  

Day 7: IT'S FINALLY TIME.  

I got a sharp-ish knife that we have for foam carving, and marked some generic cut lines.  Thanks to my co-worker Sara, we captured the first cut!  


THE REVEAL!

This also unofficially launches the F-n-B youtube channel, I guess.  I'm v glad my nails aren't filthy, but it's also very weird to see your hands from a different angle than from your body... I digress.  

If you don't want to watch the vid, the cuts were pretty successful!  After cutting them into squares, I let them dry yet another day.  I was very glad that I opted to make everything from Model Magic, as cutting tiny plastic chunks probably would have made this process much more difficult, and it's possible the MM wouldn't have stuck to the plastic and the nuts would have fallen out.  

Day 8: Stacks! The red from the cherries did streak a bit, and the almonds are basically invisible, but I'm pretty pleased with how they turned out!


I found the silver tray in stock, and ended up making a white foam tower on the inside to hold up the pyramid and get the most out of the nougat chunks.  I ended up trimming several of the edge pieces to get a square cut.  And, because the scene they're going to be in is very shiny and sparkly, I wrapped the days-dried (we're talking Day 12 at this point), in iridescent cellophane because it's FESTIVE.  


In the days since, the tray has been cut, but the nougat remains (so far).  I hope you've enjoyed this very long tutorial.  It's still not as time consuming as actually making it, but it looks real enough to eat, I think!  (Note: Our shopper found some real nougat at Trader Joe's and bought some for the shop.  It was not what I was expecting, but I also didn't hate it.  The best way I could describe it is wet marshmallow, but also tasty?  I'd eat it again.)

Friday, March 1, 2019

Fake Food Friday - Marzipan Hedgehogs

What's cute, sweet, and a little prickly?  Marzipan hedgehogs!  


For this week's Fake Food Friday, I'm going to talk about these faux-zipan treats made for a production of Don Giovanni at the Santa Fe Opera.  The show was set in the mid 1600s and there is a big banquet scene.  We opted for mostly desserts and finger foods.  Many of which I'll probably be posting for future FFFridays.  

These cute little treats are usually made out of almond paste and shaved almonds, so they'd be a great candidate for salt dough.  However, we were using them at an outdoor venue with the possibility of being stored long term in trailers, so 'real' ingredients would just invite critters to munch on them.  (I personally don't use salt dough all that often, but it's very handy for pastry in most cases.)


If this little guy looks familiar, it's because his brother is our current Instagram icon!  I'm pretty partial to these because they're just so darn cute and spiky.  


Materials: Crayola Model Magic, beads, balsa wood, acrylic paint
Tools: Olfa knife


I found this super cute research picture on a gluten-free recipe blog and figured they'd be pretty easy to recreate, and barring some weird noses, they were!


I opted for Crayola Model Magic for several reasons.  You can find it at practically every craft store, it comes in big tubs, and it's very affordable.  It also dries very quickly, and if you're in the desert like I was, it dries MEGA FAST.  For those who haven't used it, Model Magic is a light, air-dry clay.  Michaels used to have it's own version of MM, which I've also had success with.  I usually opt for the white, because you can mix acrylic paint into it.  (If you add too much, it can get suuuper sticky...)  It's very easy to use, you just pull it out of the bag and it's ready to go.  Always put unused material in an airtight container because it WILL dry out.  
For the eyes, I found some beads in stock.  They were a weird blue and made the hedgehogs look a bit alien...


After forming the bodies, I shaved a a bunch of little pieces off of a stick of balsa and stuck them into the drying form.  It didn't really seem to matter when I did this, the Model Magic is somewhat flexible even when dry, and those shards were pretty sharp... 
(Please enjoy this view of my workspace.  I put wax paper down because the hedgehogs were sticking to the paper a bit.   You can also see the large tub of Model Magic we bought for the show.  We used it for several food projects.  This picture also includes the top 3 things you'll usually find on my desk: a Dixon Ticonderoga #2 pencil, an Olfa knife, and my water bottle.  Hydration is VERY IMPORTANT.  Especially in the high desert where you are just right next to the sun and the humidity is basically negative.  I digress.)


Once they were dry and spiked, they were ready to hand over to paints!  In hind sight, I probably should have glued some of the looser spines in, but for the most part they stayed in pretty well.  


One of our props painters sprayed them almond and hand painted their little eyes (Thanks, Lisa!).  We did indeed name them all before sticking them all down.  I also made a riser to stick in the middle of the plate to elevate the center 'hogs.  We used Joe's Sticky Stuff to hold them down, and I think I'll have to make an entire post about that stuff because it's a miracle in a roll.  Unlike most of my food projects, I have zero desire to eat a marzipan hedgehog, but I would happily display a fauxzipan hedgehog on my Weird Shelf Of Stuff.  (Everyone has one of those, right?  Mine includes a fake macaron, a tiny statue of Jésus Malverde, and the most gorgeous copperleaf Cheez-it snowglobe a girl could ask for.)

-----------------------------
That's all for this week's FFFriday!  
Between my workspace and Weird Shelf, I feel y'all learned a lot more about me this week... 


(You can look forward to more gifs in posts because I think they're fun, and there's a very fair chance they'll be from Schitt's Creek, as it's my current tv obsession.)

Categories

props (35) fakery (31) faux (25) food (25) fakefoodfriday (24) theater (24) Fake Food Friday (22) cake (10) foam (9) kitchen (9) caulk (7) Albert Herring (6) casting (6) insulation foam (6) opera (6) Design Master (5) Smooth-On (5) booze (5) desserts (5) drink (5) edible (5) jaxsan (5) microfoam (5) molding (5) acrylic (4) carve (4) ham (4) resin (4) acrylic caulk (3) beverage (3) candy (3) cheese (3) cocktail (3) dressing (3) fruit (3) latex (3) model magic (3) period (3) upholstery foam (3) urethane (3) vintage (3) Helena Mestenhauser (2) Ilana Kirschbaum (2) Sarah Heck (2) acrylic paint (2) appetizers (2) brownie (2) casserole (2) chocolate (2) confection (2) decorating (2) dial (2) ephemera (2) fish (2) flower (2) foam sheet (2) gel wax (2) hot pour vinyl (2) leg (2) link (2) mocktail (2) mother mold (2) pies (2) pizza (2) reference (2) research (2) safe (2) salt dough (2) sandwiches (2) tutorial (2) wrappers (2) Canapes (1) David Russell (1) Dowel (1) Dragonskin (1) Ellie Bye (1) FX (1) Flex Foam-It (1) Fritos (1) Introduction (1) JT Ringer (1) Jess Smith (1) Keli Sequoia (1) Materials Monday (1) Oona Tibbetts (1) Poultry (1) Sara Pool (1) Serena Yau (1) Skylight (1) Smoothcast 325 (1) Turkey (1) Victoria Ross (1) Wonderflex (1) Worbla (1) alcohol (1) alginate (1) apoxie (1) aspic (1) banana (1) bead foam (1) bread (1) bundt (1) cabbage (1) carnation (1) cellophane (1) champagne (1) cheesecake (1) cherries (1) chilaquiles (1) citrus (1) clear (1) coat (1) coke (1) cola (1) contact adhesive (1) cork (1) cotton batting (1) cream (1) drinks (1) dumplings (1) fake steam (1) faux mex (1) flexcoat (1) fondant (1) fruit salad (1) glass (1) great stuff (1) gum paste (1) hands (1) herring (1) hors D'ouevres (1) icing (1) intern (1) joke (1) katie webster (1) kolache (1) labels (1) lettuce (1) life casting (1) liquid (1) martinis (1) marzipan (1) meat pie (1) menu (1) mini fogger (1) mini mister (1) nougat (1) olive (1) olives (1) oranges (1) pan dulce (1) paraffin (1) pastries (1) pastry (1) peas (1) petit fours (1) pickled herring (1) pie (1) pie crust (1) pineapple (1) prosciutto (1) punch (1) restaurant (1) samosas (1) sculpey (1) shrimp (1) small pastries (1) snacks (1) soda (1) sorbet (1) spilled (1) stage effects (1) sugarplums (1) sweetmeats (1) sweets (1) taco (1) tomato (1) tuna (1) tv dinner (1) vacuform plastic (1) violets (1) wax (1) welcome (1)