Friday, March 15, 2019

Fake Food Friday - Pimento Stuffed Olives!

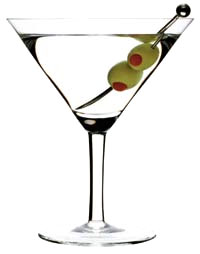
It's that time of the week, y'all!  For this week's Fake Food Friday,  we're going to start a 2 part post looking back on Anna's Dirty Martinis.  I used her process to start off, and made a few adjustments.  She, too, improved up on her olives in this post, and my process was pretty similar.  

Materials: Sculpey III, mini skewers
Tools: drinking straw, parchment paper, toaster oven

We had to make 14+ martinis, and according to tradition an even number of olives in a martini is 'incorrect.'  


Due to the large house size, we opted for 3 olives per skewer.

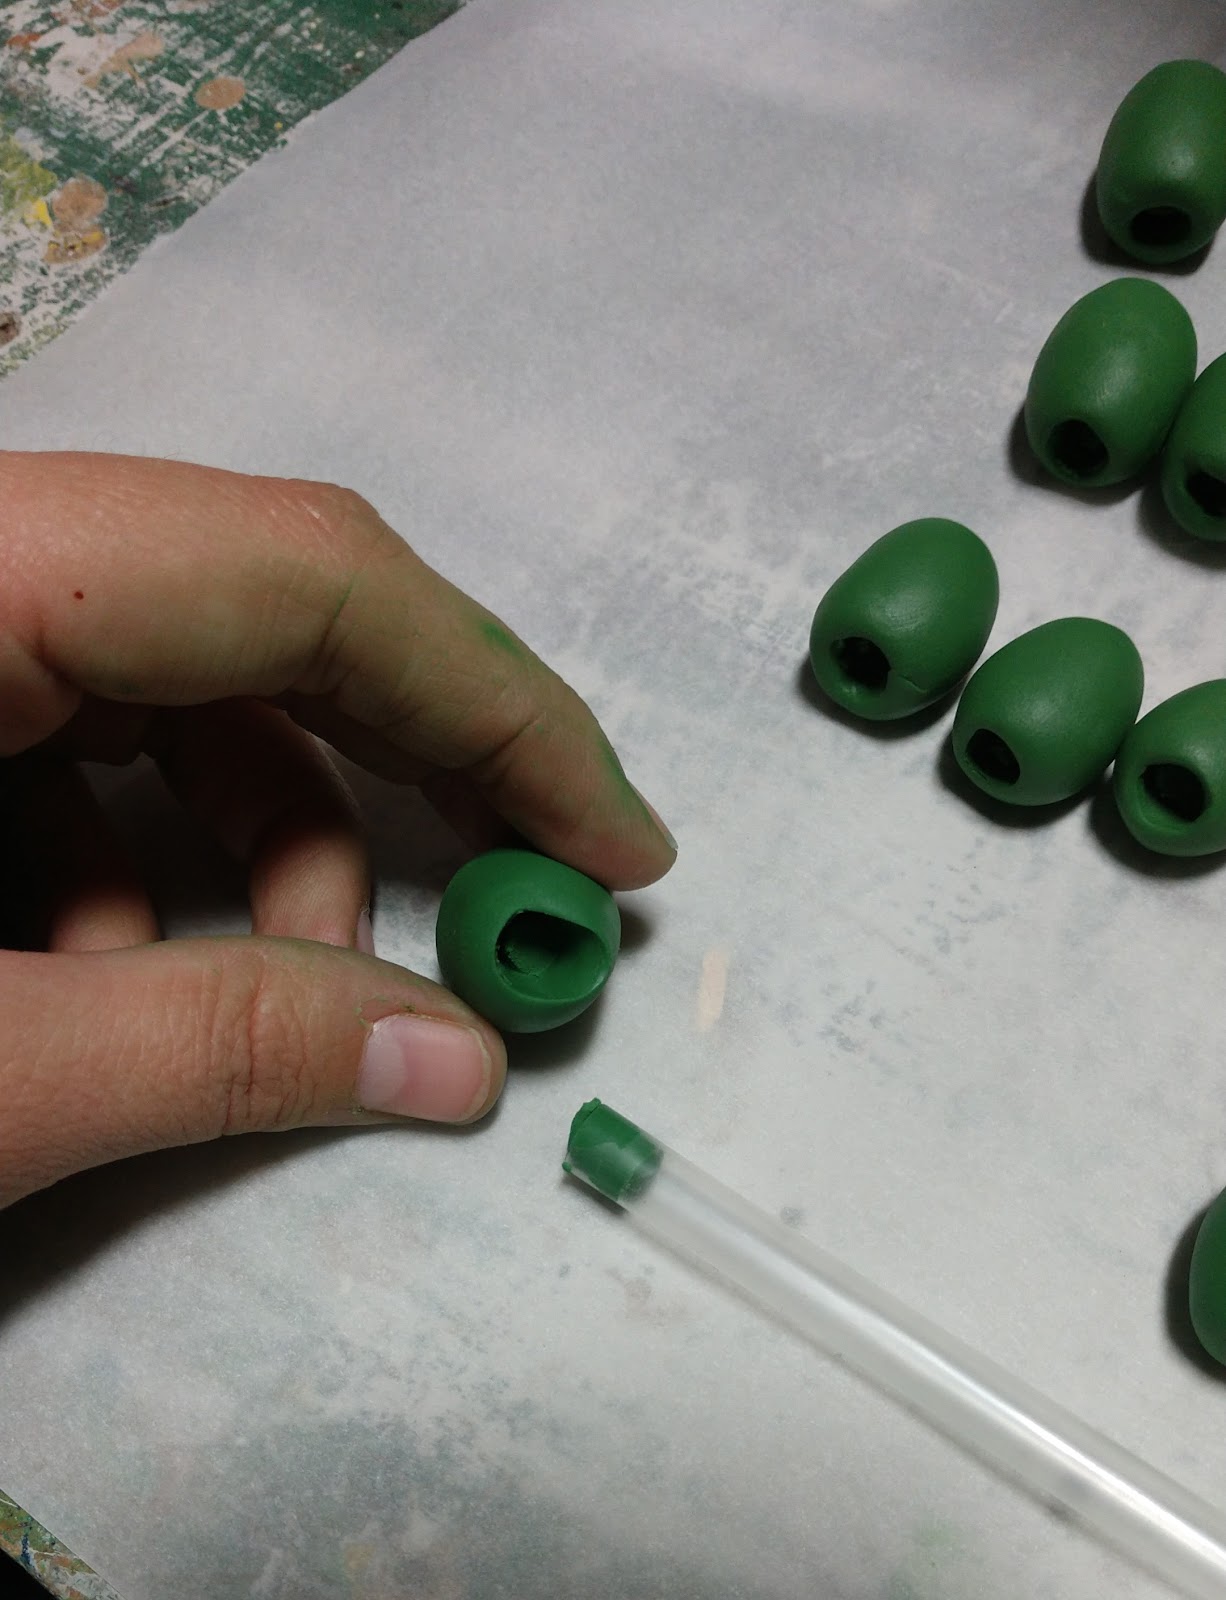
To make the pit hole, I used a straw and then gently reshaped the end.  I found it was easier to do this after the olives had set a bit after I shaped them initially.  If the Sculpey was too soft, the olive lost shape completely.  

The pimento is just a bit of red Sculpey.  Apparently olives with pimento are also incorrect in a martini according to this blog.  But green blobs wouldn't read in row FF, you know?


For the skewers, I needed something longer than traditional toothpicks, but we didn't have any cocktail spears that weren't plastic, and we learned from Anna's olives that plastic will melt in the oven.  Thankfully we had some large cocktail umbrellas that we knew we wouldn't need in the next season and a half, so I harvested their sticks.  Sorry umbrellas.  I also soaked those mini skewers in water, much like one would do before grilling kebabs.  No one wants charred martini skewers!


I made sure to line my tray with parchment paper so nothing would stick.  
Sculpey III bake time is 15 min per 1/4in at 275°F .  I opted for about 40 minutes as my olives were about 1" x 1/2".  
I should note that toaster ovens are not the most precise machines.  Most Sculpey sites suggest using a oven thermometer to make sure your temperature is correct.  

I did not do that.  


Bake little olive babies!

As you can see, my toaster oven was a bit too hot, or I left them in a bit too long.  From a distance you couldn't see the scorch marks, so I was more careful with round 2.  


Next week I'll cover the gin portion of our martinis!

Happy FFFriday! 

Friday, March 8, 2019

Fake Food Friday - Kolaches & Pastel de Guavas Guest post from Jenn Higgins

It's time for another guest #fakefoodfriday post!  This time we have some delicious looking kolaches and Pastel de Guavas from Jenn Higgins, who is an artisan at Milwaukee Repertory Theatre in Milwaukee, WI (aka where our dear founder Anna was working when she started this blog!).
For Milwaukee Rep’s production of “One House Over”, the actor was going to consume one kolache from a box of them. To create my kolache, I cut a piece of craft felt, and used spray adhesive to attach a thin layer of natural cotton batting. This helped the felt have a thicker and more pastry like texture. 

Next I painted a latex and acrylic paint mixture over the batting. 


I repeated these steps for the interior corners not covered by the “filling” (carved and painted pink foam).


A little extra acrylic paint, some hot glue to hold them together, and a sprinkle of corn starch baby powder for a powdered sugar look and they were stage ready!


These are Pastel de Guavas made for the Milwaukee Rep’s production of “In The Heights”, made of carved upholstery foam, then covered in batting and latex in a similar fashion! 


----------------------------


 Thanks for the tips, Jenn!  The cotton batting is such a great pastry texture!  Do I need to go out and get some pastries tomorrow?  That would be a hard yes.  Happy FFFriday everyone!

Monday, March 4, 2019

Materials Monday - Insulation Foam


Anna's Foam blank for Fauxsciutto

Pink foam.  Foam board.  Blue Foam.  Rigid Foam.  Foamular.  That stuff with the Pink Panther on it.  Insulation foam has a lot of names and even more applications! 

Upholstery, bead, or insulation foams are standard base for a lot of fake food, but choosing what kind really depends on the project you're working on.  We will explore all of them eventually, but first: insulation!
Insulation foam has been featured in a few posts on the blog: Cakes ala DavidCheesecake and most notably, Fauxsciutto!  

Building:Insulation foam is a great choice for stability, as it doesn't break apart like most bead foams.  You can find it in several sheet sizes and thicknesses which gives it a lot of versatility.  For large projects, insulation foam can be stacked (laminated) together, as you can see in the picture above.  

Where it really excels is detail.  Carving shapes into pink foam will hold edges and designs.
(This is the only time you will see these buns, as the finished product was rough, at best.  Let's just say my painting skills have come a long way since 2010, and it's a good thing these ended up in the trash once the show was closed.)

Carving swirls into these cinnamon buns was very easy with an Xacto knife.
Insulation foam also sands easily and evenly (unless you have a lamination line, and then it can get a bit tricky...).  

Like bead foam, insulation foam is a great material to use as a false bottom or a firm filler.  I used insulation foam here because I needed to carve a hole for the spoon and I was worried bead foam wouldn't be able to hold the weight.
Need a dip?

Adhesion & Lamination: Like most foams, you can't just use any glue to stick it together.  Spray adhesive and some contact adhesives like  Dap Weldwood Original will eat away at the foam.  Hot glue will melt it  and shouldn't be used for laminating, but low temp will work if adhering to a plate or something, especially if the foam has been coated.  (In the photo above, the hot glue melted the sides and top, but I needed texture anyway, so it worked out) 
3M FastBond Contact Adhesive 30NF is an excellent choice for laminating sheets of foam for large projects.  It comes in tan or green, and it's a low VOC formula.  It doesn't smell awful, but, as with all adhesives, should be used in a ventilated area.  Safety first, y'all!
Unfortunately FastBond isn't the easiest to get, but DAP Weldwood Nonflammable Contact Cement is a safe bet.  It's carried at the big hardware stores in small quantities, so if you're a freelancer or small shop, it's a great choice.  
Both can be rolled on with a paint roller for large sheet lamination, or an old chip brush works just as well!

Side note: I once worked in a terrible fabrication shop that ran out of green glue, opted to use spray adhesive INSIDE, then when that ran out, decided that wood glue would work, "just fine" to laminate several 2'x4' sheets together into a huge tower.  Shockingly it didn't work and I didn't go back.  

Finishing/ Paint Prep:  This all depends your final goal, but there are several ways to seal coat your foam.  
A pricey and sturdy route is Rosco Foamcoat.  It will give your piece a hard shell, which is good if you think it's going to get handled roughly, which is why I used it for the Cheesecake.  
Aqua-Resin is a liquid & powder composite resin that gets very hard when cured.  It's also pricey, but I know some carpenters swear by it.  It's likely a bit overkill for fake food, but who knows what we might need a cake to do?
Jaxsan 600 is an excellent choice for foam coverage, but it does have some texture, which could be a deal breaker depending on the project or house size.  Jaxsan is tintable, which makes finish painting faster and easier.  (I love that Jaxsan has a theater tab on their website now.  They've embraced us!)
For a lighter touch, a coat of thinned out Flex Glue and cheesecloth or tissue paper will give your foam a paintable surface.  Don't want to spend $60 on a jug of Flex Glue?  Regular white glue will work, it's just less flexible when dry.  I have definitely used unthinned bottles of white glue from the Dollar Tree because when your budget is only $350 every little bit helps.  You can also get a package of tissue paper from Dollar Tree, because they're a freelance prop artisan's best friend.  
Straight paint: I don't suggest this, but sometimes you've just gotta do what you must.  Those ugly cinnamon buns from earlier were painted without any coating, using acrylic paint.  It stuck okay, but they were only display items, and you could see all of my sanding and carving flaws up close.  Thankfully they were under glass and upstage, but I would definitely do it differently if I had to make them now.  

A note about spray paint: if you do not seal your foam in any way, spray paint will eat away at it.  Design Master Floral Sprays are less destructive, but if sprayed too thickly will still degrade your foam.  This could be used as a distressing technique, but if you do that, please, please be in a very well ventilated area and wear a respirator.  Foam melting releases all sorts of awful things that are VERY BAD for you.  

Insulation foam scrap also makes a handy stand when you don't want your item sitting on a surface.  These crusts are made from 1.5" pink foam, covered in flex glue and muslin (I was on a time crunch and we didn't have cheese cloth or tissue paper, the horror!) with some hot glue cheese and red paint sauce.  

What other materials would you like detailed on a Materials Monday?  Send me an email at fakebakeprops@gmail.com or leave a comment below!

Friday, March 1, 2019

Fake Food Friday - Marzipan Hedgehogs

What's cute, sweet, and a little prickly?  Marzipan hedgehogs!  


For this week's Fake Food Friday, I'm going to talk about these faux-zipan treats made for a production of Don Giovanni at the Santa Fe Opera.  The show was set in the mid 1600s and there is a big banquet scene.  We opted for mostly desserts and finger foods.  Many of which I'll probably be posting for future FFFridays.  

These cute little treats are usually made out of almond paste and shaved almonds, so they'd be a great candidate for salt dough.  However, we were using them at an outdoor venue with the possibility of being stored long term in trailers, so 'real' ingredients would just invite critters to munch on them.  (I personally don't use salt dough all that often, but it's very handy for pastry in most cases.)


If this little guy looks familiar, it's because his brother is our current Instagram icon!  I'm pretty partial to these because they're just so darn cute and spiky.  


Materials: Crayola Model Magic, beads, balsa wood, acrylic paint
Tools: Olfa knife


I found this super cute research picture on a gluten-free recipe blog and figured they'd be pretty easy to recreate, and barring some weird noses, they were!


I opted for Crayola Model Magic for several reasons.  You can find it at practically every craft store, it comes in big tubs, and it's very affordable.  It also dries very quickly, and if you're in the desert like I was, it dries MEGA FAST.  For those who haven't used it, Model Magic is a light, air-dry clay.  Michaels used to have it's own version of MM, which I've also had success with.  I usually opt for the white, because you can mix acrylic paint into it.  (If you add too much, it can get suuuper sticky...)  It's very easy to use, you just pull it out of the bag and it's ready to go.  Always put unused material in an airtight container because it WILL dry out.  
For the eyes, I found some beads in stock.  They were a weird blue and made the hedgehogs look a bit alien...


After forming the bodies, I shaved a a bunch of little pieces off of a stick of balsa and stuck them into the drying form.  It didn't really seem to matter when I did this, the Model Magic is somewhat flexible even when dry, and those shards were pretty sharp... 
(Please enjoy this view of my workspace.  I put wax paper down because the hedgehogs were sticking to the paper a bit.   You can also see the large tub of Model Magic we bought for the show.  We used it for several food projects.  This picture also includes the top 3 things you'll usually find on my desk: a Dixon Ticonderoga #2 pencil, an Olfa knife, and my water bottle.  Hydration is VERY IMPORTANT.  Especially in the high desert where you are just right next to the sun and the humidity is basically negative.  I digress.)


Once they were dry and spiked, they were ready to hand over to paints!  In hind sight, I probably should have glued some of the looser spines in, but for the most part they stayed in pretty well.  


One of our props painters sprayed them almond and hand painted their little eyes (Thanks, Lisa!).  We did indeed name them all before sticking them all down.  I also made a riser to stick in the middle of the plate to elevate the center 'hogs.  We used Joe's Sticky Stuff to hold them down, and I think I'll have to make an entire post about that stuff because it's a miracle in a roll.  Unlike most of my food projects, I have zero desire to eat a marzipan hedgehog, but I would happily display a fauxzipan hedgehog on my Weird Shelf Of Stuff.  (Everyone has one of those, right?  Mine includes a fake macaron, a tiny statue of Jésus Malverde, and the most gorgeous copperleaf Cheez-it snowglobe a girl could ask for.)

-----------------------------
That's all for this week's FFFriday!  
Between my workspace and Weird Shelf, I feel y'all learned a lot more about me this week... 


(You can look forward to more gifs in posts because I think they're fun, and there's a very fair chance they'll be from Schitt's Creek, as it's my current tv obsession.)

Friday, February 22, 2019

Fake Food Friday - Worbla Dumplings - Guest Post by Helena Mestenhauser


It's time for our first #fakefoodfriday guest post!  These Worbla Dumplings come from Helena Mestenhauser, and are giving me a mighty food craving...

Take it away, Helena!

Materials: Worbla, upholstery foam, gloss sealer, acrylic paint, gel wax, glossy wood tone
Tools: scissors, heat gun, hot plate

The process for worbla dumplings is actually really simple, if you have a heat gun and some upholstery foam scraps. All you need is to cut circles of the right size out of the worbla, heat the circle, and proceed as if you were filling real dumplings with pieces of unevenly torn upholstery foam. 


The worbla can get too hot and get kind of melty- just wait a second for it to cool back down again without touching it and it will solidify back into something usable. If it's burning your fingertips it's too hot, and you can always reheat it so I usually let it cool a little before trying again, but getting the hang of worbla heating and forming takes knowing how it should "feel" so if you've never used it before, practice on a scrap piece.

If you've never done dumplings before the process is really simple: 
1. put some filling in the center of the now pliable circle. 
2. fold the circle in half over the filling. 
3. press the two sides closed and together with your fingers (or a fork, if you happened to be making, say, calzones). (If you're now thinking about Ben Wyatt, same.  -Aimee. )

4. (and this is the bonus step you do with the prop but not a real dumpling) tug the ends a little towards the middle of the dumpling, so that they have a more realistic and varied gather/ruffle to the edge.  Basically its easy for something as solid as worbla to stay in a perfect half moon shape at this point- and real dumplings definitely have a little more variety.

Then, on to the paint process. If I recall correctly, I did a solid coat of almond spray, and then brought them in for a hand brushed process. 

The first layer was a glaze (gloss sealant with a little bit of orange paint in it), which I let pool in various places of the dumplings strategically to give it that "tossed in oil" shine. 

Then I added three consecutively browner and heavier glazes. This method gives the gradient a little more of a natural vibe, and it looks more like someone pan-fried these dumplings 

 Also, my trick for any prop that needs color but can't look like someone applied that color, is to brush the paint on and then dab at it with a dry rag while it's still wet until it looks right. This gets the paint to smudge into the edges and leaves it with a natural feel. 

Of course we immediately discovered that they didn't want dumplings: they wanted samosas, so I got to go back and make more filled dumpling treats. Samosas are a little more complicated to fold but they have the same basic idea: fill the center and wrap the worbla around it. In this case, real samosas are actually a much thinner dough wrapped four times around the filling, but the worbla was too thick to have that turn out well, so I truncated the shape and hid the pressed edge in the presentation on the plate. I've traced my fold lines in this photo in Photoshop so you can see what I did. 

I've also circled the end of the fold over in this photo so you can see where the folds landed. 

The other trick with folding the samosas was to be careful that the corners of the triangles stay crisp and don't elongate; they had a tendency to push against each other to make ears instead of points. Usually I was able to catch this and gently nudge them back into place before they cooled, and remember you can always reheat worbla to reshape it, so if it cools weird its not the end of the world. 

The paint process for the samosas was a lot simpler than dumplings: since the worbla was already a good brown color I just hit them with a little of our best friend, Glossy Wood Tone (Design Master spray) to give them that good, deep fried sheen. Since samosas are deep fried I didn't need to add the gloss to the paint process that I needed for the dumplings.


The dipping sauce was just a heatable gel wax, which forms a nice solid sauce with a good sheen, is pourable when hot, and cools to a sort of jello-like texture. 

Of course, mortite these down to the tray for minimal spillage and you're good to go! 
--------------

I don't know about ya'll, but I think I need some fried dough pockets.  I don't have any experience with Worbla, so this was a great tutorial for me as well!  I'd apologize for the Ben Wyatt gif, but I'm not sorry. 

There will be an upcoming post about Gel Wax, as I've recently done a bunch of food with it, and it's so great.  

Thanks for your great tutorial, Helena!  You can check out her other projects over at HelenaProps.com.  Happy FFFriday!

Friday, February 8, 2019

Fake Food Friday: Cheesecake!

Materials: Insulation foam, foamcoat, acrylic paint, spray sealer, clear epoxy, cheesecake packaging, sticker paper
Tools: Bandsaw, surform shaver, sandpaper

Hi All, welcome to our first Fake Food Friday!  I thought it would be appropriate to have our first FFF be the prop that started it all!
This cheesecake and its plated version were for You Got Older at Steppenwolf.  The packaged cheesecake came out of a grocery bag, and then later it came out on a plate, had two full size taper candles put on it, and two pieces cut out.
I started out with 1.5" insulation foam, cut into circles about the same size as my research cheesecake (yes, we all ate some after I was done!).  I used a Surform shaver tool to shave down the middle and give it a bit of an edge.  I then sanded that down, but I didn't spend too much time smoothing it out, knowing I was going to foamcoat it.
For the practical version of the cheesecake, I cut out two holes and inserted PVC pipe ends that fit the candles pretty well.  Then I did several coats of Rosco Foamcoat.  I tinted it by adding a bit of acrylic paint.


I built up a nice shell on the practical version and then cut out a quarter of the cake.   It was filled with a quarter of real cheesecake for the show, and then a layer of cheesecake filling (which is totally delicious and something I have 100% eaten straight out of the tub.)  And then I sanded it SO MUCH.
Because the foamcoat was already yellow, I didn't have to do much finish painting, but I did add a quick coat of light yellow and brushed on a bit of raw sienna to make the edges look cooked.  I then sealed the full one with clear satin spray.  For the practical cake, I sealed it completely with epoxy because I knew it was going to be by real food and washed every night.  I ended up sanding it down with some 220 grit sand paper so it wasn't too shiny.  I didn't get a picture of it though.
As we like to say on this blog, packaging SELLS IT.  This shell is from our research cake, which was conveniently empty by then... I found a logo online and printed it on some sticker paper.  As I said when I first posted it, I'd eat it.  
Unfortunately, my sticker was too subtle and we ended up taking the insert that came with the cheesecake, scanned it, and edited it so it was no longer so Chicago-y, (speaking of, if you find yourself in northern IL, I highly recommend trying some Eli's Cheesecake, which served as research and supply for our show).  This shop had a tabloid size printer, so we were able to print this on one sheet, making it look super professional.  Even though you can't see much of my cheesecake, I'd still eat it.  

There we have it, folx!  I think I need to go get some real cheesecake.  Or just some filling, I'm not picky.  Happy FFFriday!

Thursday, January 17, 2019

Hello and Happy 2019!!

Greetings All!
It's difficult to follow up such a gracious introduction from Anna, but I thought I'd introduce myself a bit more and share some of the exciting ideas I have for the future of the blog!


First about me: I am from the Greater Chicagoland Area (which Anna kindly hasn't held against me) and I've been working around town since I graduated from San Francisco State in '08.  I worked at Steppenwolf on and off for over 10 years, starting as an intern, then apprentice, overhire and staff; it was my artistic home during the 'winter' season.  For my summers I've done 9 seasons at The Santa Fe Opera, where I've met some of the most amazing, talented, and wonderful people and get to work on grand, obnoxious, and fantastic things.  I've been a freelance Prop Master/ 'designer'/ crafter at a smattering of theatres in town and have recently been working at the Paramount Theatre in Aurora, IL.  In my spare time I run a (tiny) greeting card business, embroider, marathon tv shows, try to keep up with my reading goal and drive long distances for fun, friends and food.


About the blog!
Returning folx will notice that we have a new theme and our own domain!  The theme is a work in progress, but I hope you all find it easy to navigate.  To new readers, welcome!

-I plan on adding a menu bar for easy access to post categories.  So far I'm thinking sections like: Desserts, Drinks, Meats, Casting/Molding, Packaging, and Resources.  This is definitely still a work in progress, and will evolve as we add more posts.

-Post types.  This will definitely still be a fake food blog, but sometimes there's just a good trick or funny prop that is just too good not to share.  I like to think of these as bonus posts, like when you get a completely unexpected mint or piece of candy when you're at a restaurant.

-Adding more supply, tool and technique posts.  I've used FnB as a knowledge base as long as it's been up, and more knowledge the better!

*-*Fake Food Friday and Guest Posts!  This is what I'm most excited for.  Almost a year ago (January 19th!) I posted a cheesecake on instagram and suggested that #fakefoodfriday should be a thing because it was Friday and I like alliteration. Turns out it's pretty difficult to come up with a new FFF every week, especially when you're in the middle of a five show build summer season and all you want to do when you're not at work is drink margaritas, watch Brooklyn-99 and sleep. I'm also always looking for new fake food tricks, because the best thing about working in props is that there's ALWAYS something new to learn.  So, I figured we could have the best of both worlds, different people showcasing their FFF and sharing their how-to at the same time!  There is a form in the right sidebar (just yon -->), if you would like to submit your favorite, most fulfilling or I-hated-this-project-but-I-learned-a-lot project to be posted on an upcoming #fakefoodfriday!  I will likely post a more comprehensive stand alone post on this in the future, especially if I can figure out how to make that form... better.*  (*I am not a coder, but I'm learning.  Please tell me if things are broken...like the links at the top of the page.  Working on it!)

-Instagram!  I've also started an insta to show off projects, tips, and of course, #fakefoodfriday posts to link back to the blog!  I'm also thinking about a #WhatNotToDoWednesday, because mistakes happen.  They happen so much.  @fakenbakeblog, follow us!

However you've stumbled upon us, I'm glad you've found the Fake 'N Bake Kitchen!

And to Anna, thanks for passing the torch, still answering all of my random questions, and all of the puns.  I LOVE THE PUNS.


Tuesday, July 3, 2018

AY-MAY!


Howdy all,

When I first started my fake food blog, my husband said 'just don't be one of those people who starts a blog and then stops posting- people hate that.' Oops. I know that there are still some of your folks out in the theater world who find this blog useful even though it is basically an archive now, but I think Fake 'n Bake is really cool, and I'd like to see it continue to show off new and ridiculous projects!

Lucky for me (and for you, I think) there's a gal in my life who is one of the funniest people I know AND she's a skilled props artisan who enjoys making fake food AND she also wants Fake 'n Bake to keep going! So, I am unceremoniously dumpi- uh, I mean, gracefully bestowing the Fake 'n Bake blog upon her capable shoulders.

Aimee Plant is a props-artisan extraordinaire. She followed me as Props Master Craftsperson at Santa Fe Opera. Her resume includes work for Actor's Theatre of Louisville, Steppenwolf, Pavement Group, and others. She is the keeper of quotes, the maker of cheesy potatoes, and the person always willing to share her snacks with me- even when I accidentally steal them out of the freezer when I'm drunk. (I replaced it. Sorry, Aimee.) She's one of my best friends in the world- and has saved my sanity on many an occasion. I think you'll find her just as hilarious and talented as I do.

This has been so much fun- and I hope to pop in occasionally with guest posts. Y'all are swell- thank you for the fun times!

Ladies and Gentlemen, I give you Aimee Plant!

Wednesday, February 18, 2015

Categories

props (35) fakery (31) faux (25) food (25) fakefoodfriday (24) theater (24) Fake Food Friday (22) cake (10) foam (9) kitchen (9) caulk (7) Albert Herring (6) casting (6) insulation foam (6) opera (6) Design Master (5) Smooth-On (5) booze (5) desserts (5) drink (5) edible (5) jaxsan (5) microfoam (5) molding (5) acrylic (4) carve (4) ham (4) resin (4) acrylic caulk (3) beverage (3) candy (3) cheese (3) cocktail (3) dressing (3) fruit (3) latex (3) model magic (3) period (3) upholstery foam (3) urethane (3) vintage (3) Helena Mestenhauser (2) Ilana Kirschbaum (2) Sarah Heck (2) acrylic paint (2) appetizers (2) brownie (2) casserole (2) chocolate (2) confection (2) decorating (2) dial (2) ephemera (2) fish (2) flower (2) foam sheet (2) gel wax (2) hot pour vinyl (2) leg (2) link (2) mocktail (2) mother mold (2) pies (2) pizza (2) reference (2) research (2) safe (2) salt dough (2) sandwiches (2) tutorial (2) wrappers (2) Canapes (1) David Russell (1) Dowel (1) Dragonskin (1) Ellie Bye (1) FX (1) Flex Foam-It (1) Fritos (1) Introduction (1) JT Ringer (1) Jess Smith (1) Keli Sequoia (1) Materials Monday (1) Oona Tibbetts (1) Poultry (1) Sara Pool (1) Serena Yau (1) Skylight (1) Smoothcast 325 (1) Turkey (1) Victoria Ross (1) Wonderflex (1) Worbla (1) alcohol (1) alginate (1) apoxie (1) aspic (1) banana (1) bead foam (1) bread (1) bundt (1) cabbage (1) carnation (1) cellophane (1) champagne (1) cheesecake (1) cherries (1) chilaquiles (1) citrus (1) clear (1) coat (1) coke (1) cola (1) contact adhesive (1) cork (1) cotton batting (1) cream (1) drinks (1) dumplings (1) fake steam (1) faux mex (1) flexcoat (1) fondant (1) fruit salad (1) glass (1) great stuff (1) gum paste (1) hands (1) herring (1) hors D'ouevres (1) icing (1) intern (1) joke (1) katie webster (1) kolache (1) labels (1) lettuce (1) life casting (1) liquid (1) martinis (1) marzipan (1) meat pie (1) menu (1) mini fogger (1) mini mister (1) nougat (1) olive (1) olives (1) oranges (1) pan dulce (1) paraffin (1) pastries (1) pastry (1) peas (1) petit fours (1) pickled herring (1) pie (1) pie crust (1) pineapple (1) prosciutto (1) punch (1) restaurant (1) samosas (1) sculpey (1) shrimp (1) small pastries (1) snacks (1) soda (1) sorbet (1) spilled (1) stage effects (1) sugarplums (1) sweetmeats (1) sweets (1) taco (1) tomato (1) tuna (1) tv dinner (1) vacuform plastic (1) violets (1) wax (1) welcome (1)