Friday, May 10, 2019

Lettuce! - A Quick #FFFriday from Katie Webster!

This week's Fake Food Friday is quick one, mostly because I just started my summer job in Santa Fe and the lack of air here has made me le tired.  Anna made some lettuce for The Dagwood of Your Dreams, which was awesome and cartoony.  Katie Webster at the Denver Center has a slightly different technique for a different look!
-------------------------------------------------------------


Another fun faux food project with the thin packing foam sheet! My fellow prop artisan Roo Huigen had made adorable seedling sprouts with the translucent packing foam. I thought I could translate her idea into lettuce form when we had to make crates of abundant food for Oklahoma! In this case, I cut loose leaf shapes from a shiny, sheer, synthetic fabric that we had in our fabric stock. 
That was key to the success of this project and saved a lot of time. If you were trying to recreate this exact process, it will depend on the fabric you have access to, and you will have to experiment to achieve the look you want. Look for sheer, somewhat stiff synthetic fabric. Luckily we had green, but a pale yellow or white could work.
 Then I used hot glue to create leaf veins on the fabric leaf. While it was cooling I sandwiched on a layer of the thin packing foam. 

I trimmed the edges of all the leaves, then in a well ventilated area I used a heat gun to melt the fabric and foam. The foam and fabric melt at different times, creating organic ripples and soft curled edges and emphasizing the hot glue 'veins'.

I toned the leaves with various Design Master sprays to maintain the translucent look of the leaves. 


---------------------------------------------
Thanks, Katie!  I'd love to see how this technique looks with different fabric colors, it could make for some very interesting greens.  

Katie is a part of INCITE Colorado and you can learn about them here!  She also contributed a post about some excellent looking conchas and chilaquiles.  

Friday, May 3, 2019

Leftover Pizza - #FakeFoodFriday

Friday is pizza day, the best day of the week!
This leftover pizza was made for Max Bialystock's office in The Producers.  I got to work with my new favorite material, gel wax!  I hope y'all are ready for a lot of pictures, because I went overboard on this project...


Materials: Cake boards, shelf liner, Foamies sheet foam, Jaxsan, thin thermoplastic, Gel Wax, sawdust, Glossy Wood Tone, acrylic paint, machine or mineral oil
Tools: Olfa knife, hot plate & pan, spoon, heat gun, cheese grater (if you have a non-food one)


I started with some wedges of shelf liner laminated to some sheet foam (foamies, fun foam, etc depending on where you buy them), and then coated with Jaxsan, building up a slight crust edge on one side.  


I then painted with acrylic and dusted with glossy wood tone.  I also made pepperonis out of some thin thermoplastic that I found in stock.  


For my sauce, I melted some gel wax and added wax dye for color. I did a lot of sampling on white to see what it would look like when it was dry. I ended up adding some regular white candle wax to firm it up and add some opaqueness.

I also ended up adding some sawdust in hopes to add some tomato-y texture. In the end I should have used more, as it didn't build up as much as I hoped that it would.


I spooned my gel wax onto my pizza slices and let it set.  As you can see, my sawdust didn't add as much body as I thought it would once it was on the slices.  

CHEESE!
For the cheese I tinted more gel wax and put it in a mini pie tin to cool.  (I've actually been keeping several of the pie tins around because they're great to use with the gel wax.  They're non-stick so everything peels or pops out and it's super handy.) I used a mix of yellow and brown tints and added quite a bit of white regular wax (really they were old emergency candles because that's what I had). There was also a wedge of yellow wax that was in our materials stock that I grabbed in case I wanted to add a little variety into the cheese.  


I couldn't find a grater in stock, so I shaved my cheese with an Olfa knife and added in the pepperoni slices.  


It's super hard to hold a heat gun and take a picture at the same time

Cooking the pizza!  Which basically entailed me passing a heat gun over the slices until my wax melted again.  i tried not to fully melt all the cheese to keep some of the texture, so I did it in stages.


Previously I had artfully added some machine oil (mineral oil or sewing machine oil also works) to my cake boards to make them look greasy.  I don't recommend using any kind of real veg oil because it can smell.  
I just slapped my slices down, sprinkled some leftover sauce and cheese wax and hit it with a heat gun again.  I tried smearing some of the sauce around as well.  I ended up using the wax to hold the slices on, which was moderately successful.  Hot glue probably would have been more effective, but I didn't have a hot gun handy and was in a hurry (of course).  


I let them cool and off they went to rehearsal.  They ended up stuck in funny places as 'gross' set dressing.  


Though thin crust isn't my favorite, I'd still eat it, because any pizza is better than no pizza... unless it's made of foam and wax, I guess... 

At the time this post goes live I'll be on my way to my summer job in Santa Fe, where I will definitely be eating pizza with green chile at some point.  If all goes according to plan, Fake Food Fridays will continue throughout the summer!  As always, I'm still accepting guest tutorials!

Friday, April 26, 2019

Slammin' Ham! - FFFriday Guest Post from Victoria Ross

After a brief and accidental hiatus, guest Fake Food Friday's are back, and it's back with a bang or rather, a slam!  This excellent ham is courtesy of Victoria Ross at Triad Stage and was mentioned on Silk Flowers and Papier Mache Hearts in Episode 37 - Skin of A Dragon. This post is also a return to casting and molding, which we haven't had in ages.  

-----------------------------------------------------------------------
Raw, Bloody Ham - Two Trains Running at Triad Stage 2019
What a glamour shot... or should I say hamour shot?

Materials: Smooth-On DragonSkinVaseline, mineral spirits, Smooth-On Silc Pig, Smooth-On Psycho Paint, leftover silicone (for filler)
Tools: ham mold, mixing containers, stir sticks, Personal Protective Equipment
Safety Note: Though DragonSkin is Certified Skin Safe, always read the Technical Bulletin for any casting and molding materials before you use them, and follow common sense safety procedures.

Step One: Procuring a Ham Mold


The mold was created for a previous production molded off of a real ham, and it was originally intended for expanding foam. Since I would be casting in silicone, I needed mold release. I made my own release from vaseline and mineral spirits, which worked like a charm! To limit the volume of Smooth-On Dragon Skin needed, I filled the core of the ham with a silicone 'pit' -- a pink chunk left over from past materials (we save everything for this exact reason). I secured the two-part mold with ratchet straps, cradled it in upholstery foam scraps within a box, mixed my parts and began to pour.

Step Two: Washing a Ham

Our ham was cast from Dragon Skin tinted with Smooth-On Silc Pig pigments. I made the rubber a fleshy hue with subtle white and red streaks to provide a 'base coat' of color.
I washed the mold release off the ham to prepare it for painting.

Step Three: Painting a Ham

Painting with tinted rubber is a blast! I used Smooth-On (are they a sponsor yet?) two-part Psycho Paint with the Silc Pig pigments to create my pallet of pinky flesh, reddish brown blood, and white fat marble. I based my highlights and shadows from a research image, and I used popsicle sticks and my fingers to paint the rubber paint onto the ham.


Step Four: Slamming a Ham

Once the ham was dry and all silicone paint had bonded to itself, I gave the ham a thorough bath and handed it off to stage management. The ham interacts with stage blood on the actors hands, so having it be washable was a must. It also is slammed on the counter, and the weight and slap of rubber makes the effect truly deliver. The lighting designer even gave the ham its own spot light - a most appropriate lighting for a ham, after all.

-----------------------------------------------------------------------------------------
What a gorgeous ham and epic lighting!  Thank you Victoria for sharing.  You can check out more of Victoria's projects at http://www.propertyofprops.com/.

And no ham post is complete without one of my favorite gifs of all time: 

Friday, April 12, 2019

Balloon Birthday Cake - FFFriday

Not sure if it's a weird theater thing, but I have a LOT of friends that are Aries/Taurus/have Spring birthdays (myself included), so in honor of them, this FFFriday is a birthday cake!


Materials: Pink Insulation Foam, PermaIce, acrylic paint
Tools: Bandsaw, sandpaper, icing spatula, piping tips, plastic zip top bags/ piping bags

For a production of The Herd at Steppenwolf I was tasked with what is a pretty 'simple' food prop, it didn't need to do anything fancy, it just came out on a tray and no one touched it.  I was given 3 instructions: It's chocolate, it needs balloons and it needs to say "Happy 21st Andrew" on it.  

Unfortunately I didn't get any pre-frosting pictures, but I stacked two circles of insulation foam on top of each other and used FastBond Contact Adhesive to stick them together.  


We didn't have our cake board  (a cardboard or foil covered board that the cake sits on) yet, so I placed the cake onto a piece of wax paper to ice and pipe it, because the PermaIce doesn't stick to it.  
A note about PermaIce: It's awesome and no longer available... however it looks like Deco-Frost is a similar product.  However, spackle or acrylic caulk are much more cost efficient materials to use as icing as seen in Cakes ala David and One Last Herring Cake.
I tinted the PermaIce with acrylic paint and smeared it on with a spatula.  I piped the edges using a star tip and had a TERRIBLE time because my PermaIce was... chunky (and old and a bit dried out) and kept getting stuck.  
For the words, I used straight PermaIce and piped it onto the wax paper, so if I messed up, I could scrape the icing back into the bag (also a good way to practice!).  I let the letters fully dry and then glued them on with white glue.  

Balloons!

Cake balloons are usually solid icing, but I didn't want to attempt to pipe them, in the interest of time and effort.  So I shaped them out of more insulation foam (after laying out how big they should be on this very fancy drawing I made).  

Can you see my piping lines?

I then covered them in more PermaIce, tinted with more acrylic paints.  I did this on wax paper and transferred it to the cake, just like I did with the letters.  Because I had limited piping tips, I ended up using a small tip and 'filling in' the balloons, then smoothing it out before it dried.  I also did a bit of sanding.  Then I glued them down and added some tiny balloon strings.  


And there we have it!  I glued it to the cake board using hot glue and far as I know, it's still fully intact sitting in storage to this day.  Happy Birthday/ Unbirthday everyone!

Friday, March 29, 2019

Conchas & Chilaquiles Faux-Mex - FFFriday Guest Post from Katie Webster!

This week's guest post comes from the delightful Katie Webster at the Denver Center for the Performing Arts.  I had the good fortune of working with Katie at the Santa Fe Opera!

Take it away, Katie!

---------------------------------------
Pan Dulce: 
We had some delicious Mexican food to create for a production of American Mariachi at the Denver Center for the Performing Arts. For this box of pan dulce, including the charming Conchas, everything started with upholstery foam scraps. There are soooooooo many styles (have you seen the Elote ones---bread shaped like corn?) but the conchas are colorful and instantly recognizable. 


I sculpted the upholstery foam into a dome shaped bun. Then I scored the 'shell' pattern into it, maybe 1/4" deep. I sliced away selectively to mimic the cookie crumble topping that is on the conchas. 

A few years ago I learned to keep my blade oiled up when carving any type of foam! 


The Cuernas were shaped by cutting a triangle of 1/4" thin upholstery foam sheet, sprayed with Foam and Fabric adhesive, and then rolling up like you would a real crescent roll.

Then I did a tissue paper layer ( I used Rosco Crystal Gel as the medium but white glue would do the trick).


Next it came down to painting: they definitely got dusted with Design Master's Glossy Wood Tone. For the colorful 'toppings' I used some tube acrylic colors as they had a nice thickness. The finishing touch was a sprinkle of translucent glitter while wet to really capture the sugar coated look. Cinnamon sugar was finely ground cork mixed with glitter, and the powdered sugar was a bit of styrofoam shaved off with a rasp.


Chilaquiles: 


The chilaquiles feature one of my favorite faux food materials, the foam that comes in various thicknesses for packing material! I don't even have a precise term for this, do you know? I've heard so many names for this stuff!  Foam packing sheets, slip sheet, micro foam and roll foam.  It is SO HANDY for fake food! -Aimee

A menagerie of foams!

For the radishes, I cut circles of the foam and painted the edges red while I held them in a stack between thumb and forefinger. 


For the fried tortillas, I cut triangles of the same foam and then gently warmed them with a heat gun. (I tossed them all in a small cardboard box to do this, as they will blow around a lot!) The heat gun melts them just enough to curl and round over the edges to look more like fried chips.

The most time consuming part was the dry time of painting the chips, I tinted Rosco Crystal Gel a light yellow base color and painted each chip. I let dry supported on toothpicks, and then I glazed them all with a wash of reddish brown. 


The garnishes were really fun as well, avocados carved from insulation foam and painted with tinted Crystal Gel. Wood shavings spray painted green for green onions. Crumbled styrofoam for cheese. Small bits of upholstery foam spray painted red and green for tomato and jalapeño. I used some real Chile flakes as well to help my paint look more like sauce! Also, the real cast iron skillet helps complete the illusion. 
--------------------------------

Thanks Katie!  These look awesome and I would 100% like to eat it all.  


Katie is a part of INCITE Colorado and you can learn about them here!

Friday, March 22, 2019

FFFriday: Martinis!

Happy Fake Food Friday everyone!  It's time for part 2 of our revisit of Anna's Dirty Martinis!  In part 1 I went over my olives, and now it's time for the fun part: The liquor!


Materials: Gel Wax, acrylic martini glasses, olives on skewers
Tools: Hot Plate, small pan, spoon

Anna used acrylic water for her martinis, but for ours I used one of my new favorite materials, gel wax!  I'll be doing a Materials Monday on it because it is so nifty and has so many uses.  In this project I used ArtMinds Gel Wax from Michaels.  
A quick run down of Gel Wax: it comes in a tub, and you can get it at pretty much any craft store in the candle making section.  You can color it with wax dyes and you can heat it on a stove top.  It's solid once it cools, so it's much quicker than the acrylic water.  
Hot plate set up


Because I didn't need to dye the martinis any color, I didn't bother to measure how much gel wax I was using.  I just put a bunch in a pot and let it heat up.  Because I wanted them to be as clear as possible, I made sure I heated the wax until all the bubbles were out and it was very liquidy.  The big risk in this is if you're pouring into an acrylic vessel (as is the case most of the time for theater) is that it might melt.  I didn't melt any glasses this time around, but I've definitely done so in the past (and will gladly share in my gel wax post).  I also read that you want to make sure to use a metal stirrer, not wood, because wood can introduce bubbles into the wax.  My skewers definitely did!


The cool thing about gel wax is you can pour it in layers and not get stratified lines because the wax just melts into itself.  These are my first two half pours.  I noticed that I was getting bubbles, both from the wooden skewers and from the cool air.  


They became more pronounced as the wax cooled.  


Heat the wax, heat the glass!

I tried to warm up my area and the glasses a bit with a space heater, and that did seem to help some.  


In the end, I couldn't get rid of my bubbles.  I did find that pouring the wax, then placing the olive skewer did help to make sure the wax got all the way around the olives, but bubbles still happened.  This wasn't a huge problem for us, as our house size is huge, and the bubbles actually made it look like there was liquid in the glass.  


Two of my best pours

I never did get a shot of all of them together, as we were rushing to get these to rehearsal.  I think they turned out pretty well, despite the bubbles.  If I were to do it again, I'd probably seal the skewers and olives in hopes that they wouldn't cause as many bubbles, but I'd want to do a test to see if a spray sealer would react in any way with the wax.  
Shortly after this project, (and after I had finished this tub of wax), I did a round of champagne with a different brand, Country Lane Gel Wax from Hobby Lobby, which barely bubbled at all!  That was unfortunate for the champagne, but would have been perfect for these martinis!  Ah, well, live and learn.  

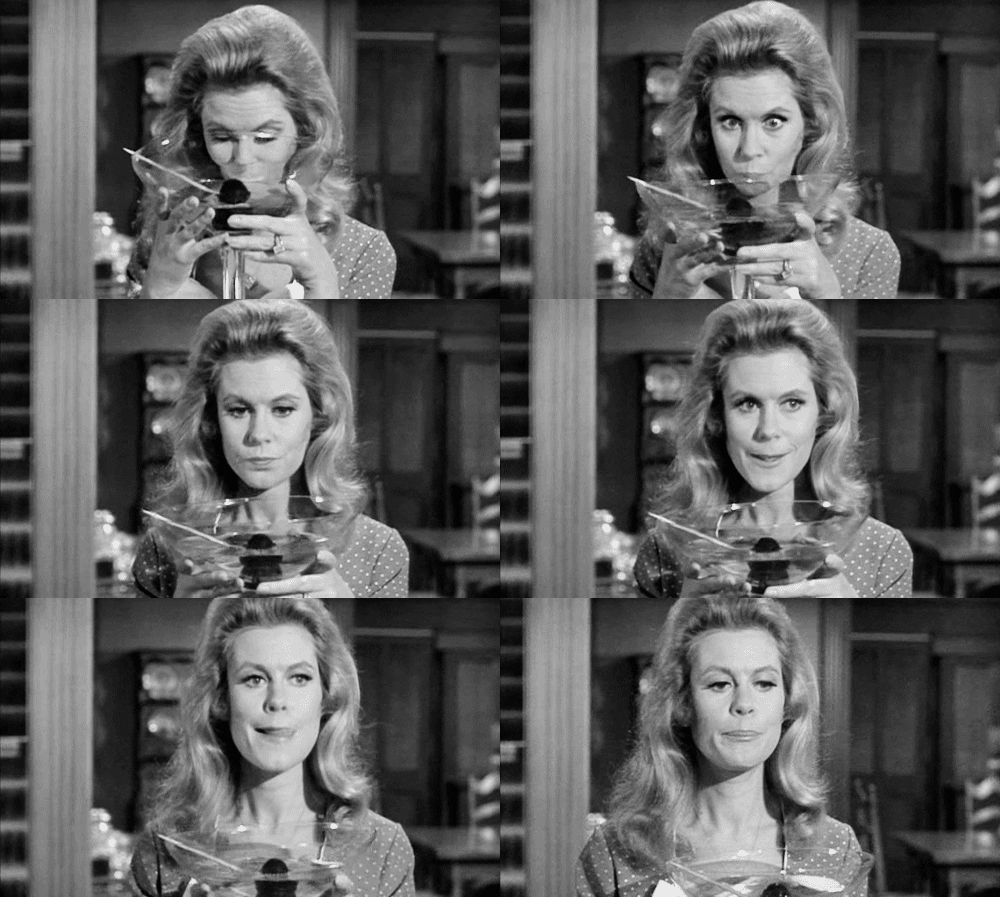
I'm not really a martini girl, so I can't say this project made me want one, but my summer boss Randy is a big fan, so I'm going to end this with a quote from him.  

"It's like a salad if you get it extra dirty" 

Cheers!

Categories

props (35) fakery (31) faux (25) food (25) fakefoodfriday (24) theater (24) Fake Food Friday (22) cake (10) foam (9) kitchen (9) caulk (7) Albert Herring (6) casting (6) insulation foam (6) opera (6) Design Master (5) Smooth-On (5) booze (5) desserts (5) drink (5) edible (5) jaxsan (5) microfoam (5) molding (5) acrylic (4) carve (4) ham (4) resin (4) acrylic caulk (3) beverage (3) candy (3) cheese (3) cocktail (3) dressing (3) fruit (3) latex (3) model magic (3) period (3) upholstery foam (3) urethane (3) vintage (3) Helena Mestenhauser (2) Ilana Kirschbaum (2) Sarah Heck (2) acrylic paint (2) appetizers (2) brownie (2) casserole (2) chocolate (2) confection (2) decorating (2) dial (2) ephemera (2) fish (2) flower (2) foam sheet (2) gel wax (2) hot pour vinyl (2) leg (2) link (2) mocktail (2) mother mold (2) pies (2) pizza (2) reference (2) research (2) safe (2) salt dough (2) sandwiches (2) tutorial (2) wrappers (2) Canapes (1) David Russell (1) Dowel (1) Dragonskin (1) Ellie Bye (1) FX (1) Flex Foam-It (1) Fritos (1) Introduction (1) JT Ringer (1) Jess Smith (1) Keli Sequoia (1) Materials Monday (1) Oona Tibbetts (1) Poultry (1) Sara Pool (1) Serena Yau (1) Skylight (1) Smoothcast 325 (1) Turkey (1) Victoria Ross (1) Wonderflex (1) Worbla (1) alcohol (1) alginate (1) apoxie (1) aspic (1) banana (1) bead foam (1) bread (1) bundt (1) cabbage (1) carnation (1) cellophane (1) champagne (1) cheesecake (1) cherries (1) chilaquiles (1) citrus (1) clear (1) coat (1) coke (1) cola (1) contact adhesive (1) cork (1) cotton batting (1) cream (1) drinks (1) dumplings (1) fake steam (1) faux mex (1) flexcoat (1) fondant (1) fruit salad (1) glass (1) great stuff (1) gum paste (1) hands (1) herring (1) hors D'ouevres (1) icing (1) intern (1) joke (1) katie webster (1) kolache (1) labels (1) lettuce (1) life casting (1) liquid (1) martinis (1) marzipan (1) meat pie (1) menu (1) mini fogger (1) mini mister (1) nougat (1) olive (1) olives (1) oranges (1) pan dulce (1) paraffin (1) pastries (1) pastry (1) peas (1) petit fours (1) pickled herring (1) pie (1) pie crust (1) pineapple (1) prosciutto (1) punch (1) restaurant (1) samosas (1) sculpey (1) shrimp (1) small pastries (1) snacks (1) soda (1) sorbet (1) spilled (1) stage effects (1) sugarplums (1) sweetmeats (1) sweets (1) taco (1) tomato (1) tuna (1) tv dinner (1) vacuform plastic (1) violets (1) wax (1) welcome (1)